- 1. Create a PISTE account and production app
- 2. Create your Chorus Pro API connection in production
- 3. Open Bee™ Portal Setup: Chorus Pro Connector
1. Create a PISTE account and production app
The creation of a PISTE account is required to connect to Chorus Pro.
PISTE replaces the Chorus Pro API platform.
Please go to the PISTE platform: https://developer.aife.economie.gouv.fr/
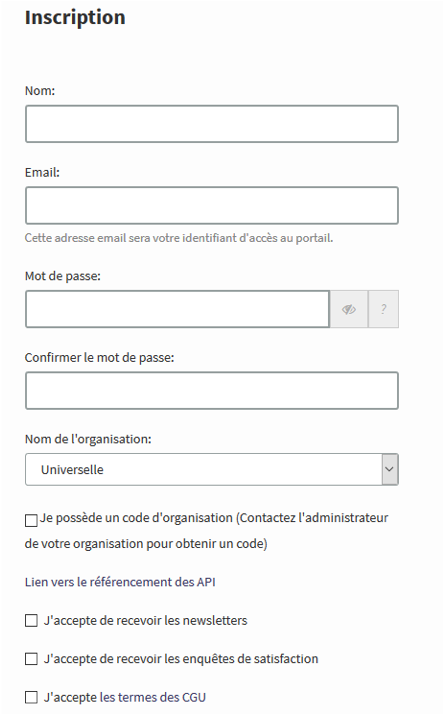
The first step is to create an account on PISTE, click on ” REGISTER “, then you must fill in the following mandatory fields and accept the T&Cs:
- Name
- Email address
- Password
- Organization name: choose “Universal”
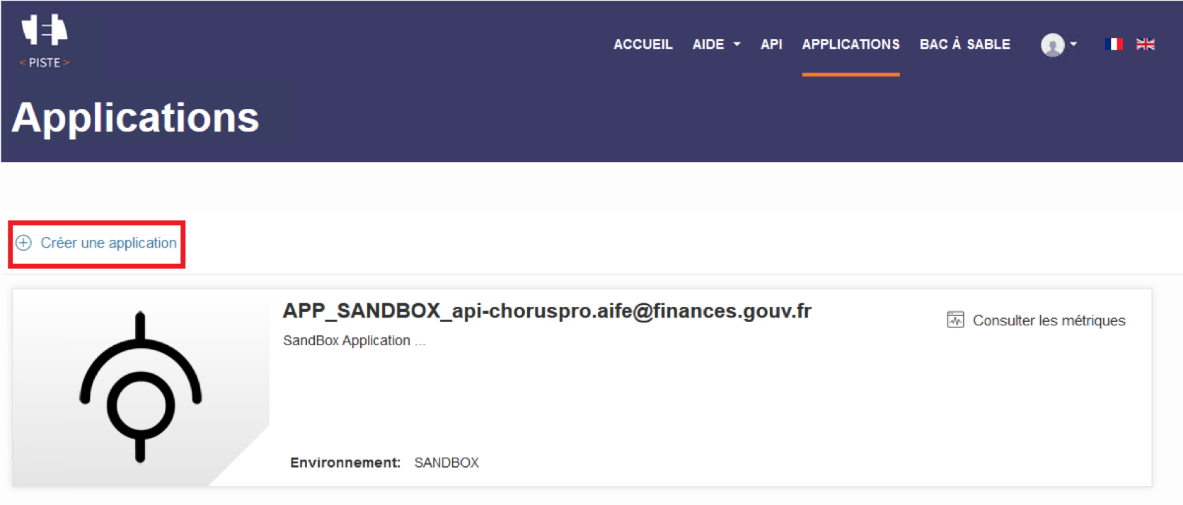
Once your account has been created, PISTE automatically generates a SANDBOX application that will only be used to connect to the Chorus Pro qualification environment
To connect to production, you need to create a dedicated application by clicking on the “Create an application” button.
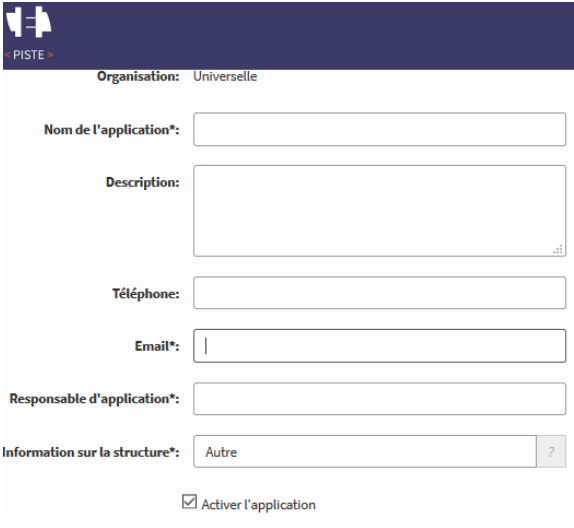
The following fields must be completed:
- Application name: This name must be unique and will be used when creating the API connection on the Chorus Pro portal
- Email: email of the application manager
- The person responsible for the application: a person that the Chorus Pro or PISTE team can contact
- Information on the structure: fill in the SIRET of the structure
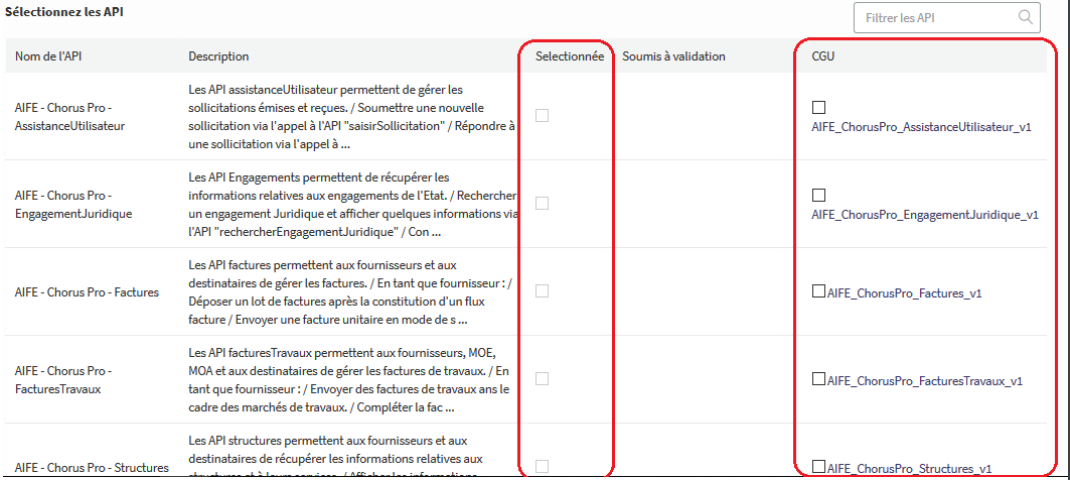
Check the T&Cs of all Chorus APIs, i.e. each line where the word Chorus Pro appears, and then select these APIs. Click on the ” Validate my T&Cs choices ” button and then click on ” Save application ” to finalize.
2. Create your Chorus Pro API connection in production
Prerequisite:
- Have a production application on PISTE
- The ” EDI/API connection ” space open for the structure that wishes to connect
- Have the authorisations on the ” EDI / API connection ” space
Please visit the Chorus Pro website: https://chorus-pro.gouv.fr/
To finalize your PLC connection to Chorus Pro in production, you must declare your TRACK connection.
To do this, once connected, you must access the ” EDI and API connection ” area and click on the ” Manage API connection ” tab. To create the connection, please click on the ” Declare a RUNWAY connection ” button.
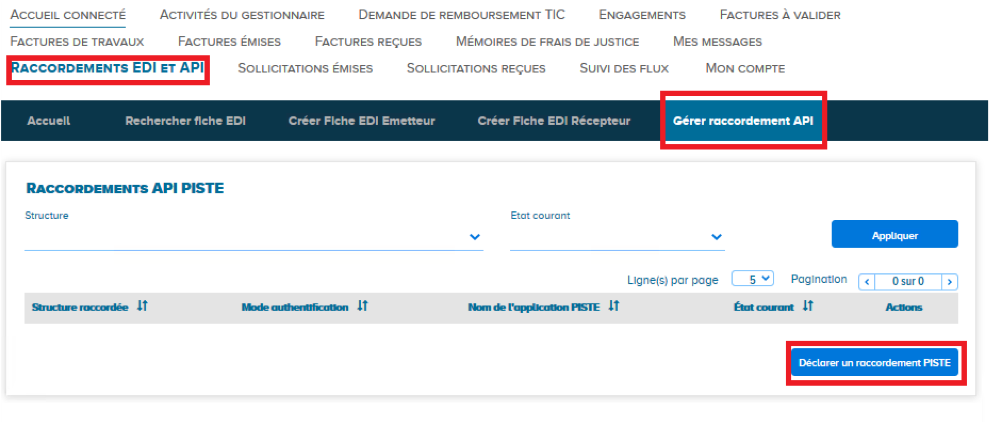
If the EDI and API CONNECTIONS space does not appear in the CHORUS menu
• Click on MANAGER ACTIVITIES
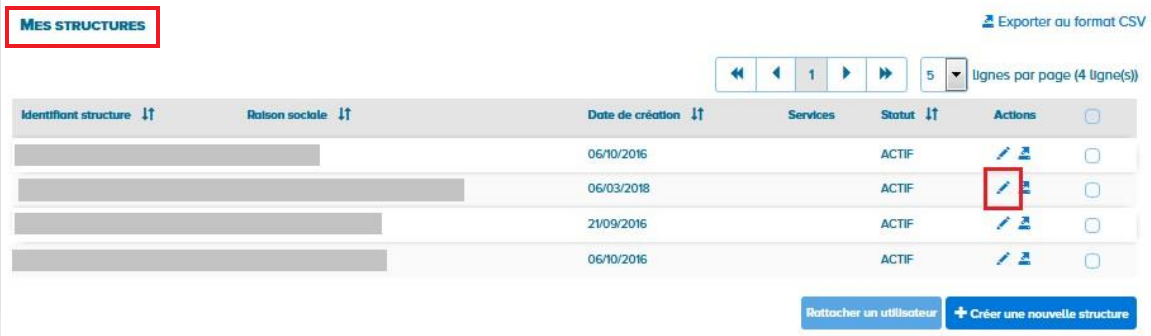
• Go to My Structures and click on the pen to edit the structure
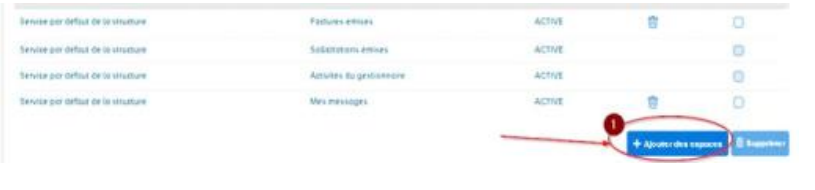
• In the LIST OF SPACES section of the STRUCTURE, click Add Spaces
• Select EDI and AP I Connectionin the Edit column and validate
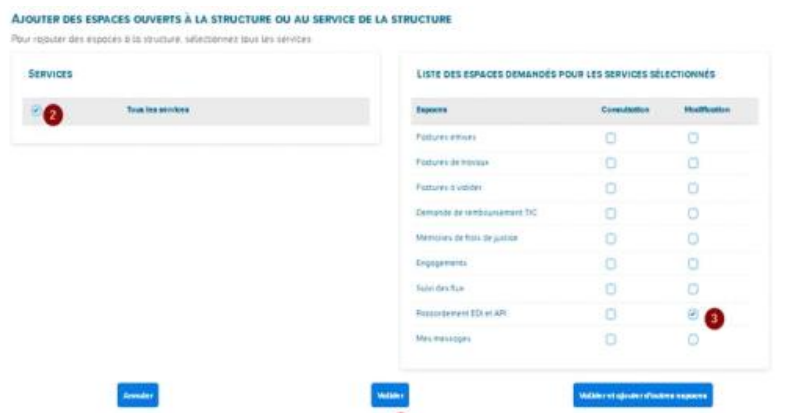
• Log out of your CHORUS account and then log in again to see EDI and API CONNECTIONS
Once connected, you can access the ” EDI and API connection ” area and click on the ” Manage API connection ” tab.
To create the connection, please click on the ” Declare a RUNWAY connection ” button.
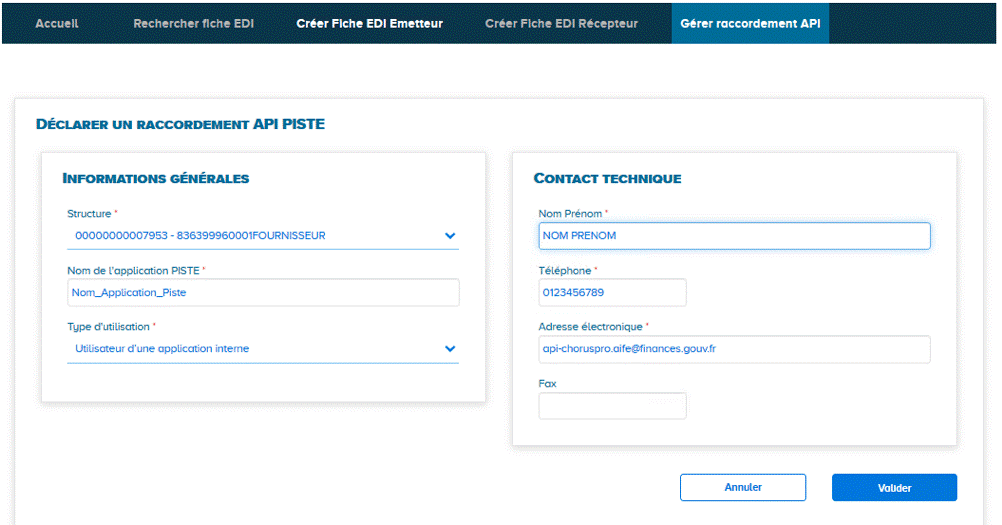
Complete the form for creating a PISTE connection:
- Structure: Choose the structure to connect
- Application Name: Enter the name of the production application that was created on TRACK, example: MON_APPLICATION_CHORUS_PRO. Be careful, check the spelling and case, the name must be identical to that of the production application created in TRACK. In addition, it is not possible to enter a SANDBOX application on the Chorus Pro Production Portal.
- Type of use: allows you to identify your type of use, you can choose ” User of a solution from a publisher or operator ” and enter ” Open Bee” in the Publisher / solution field
- Technical Contact Information: Enter the technical contact information.
3. Open Bee™ Portal Setup: Chorus Pro Connector
The final step is to modify the configuration of Open Bee™ Portal : Chorus Pro Connector to add the OAuth2 credentials.
Prerequisite:
- Open Bee™ Portal : Chorus Pro connector version 6.11.2 or higher
- Have created a production TRACK application
- The PISTE connection in the Chorus Pro portal is effective
Please connect to TRACK: https://developer.aife.economie.gouv.fr/
Click on your production application and scroll down to the ” Oauth IDs ” insert, retrieve the OAuth IDs, Client ID , and click ” View Secret ” to get the value of the Secret Client. Set this information aside.

In Open Bee™ Portal : Chorus Pro Connector, you need to update the authentication configuration.
Case 1: Supplier
Click on ” Configuration “, then for each supplier:
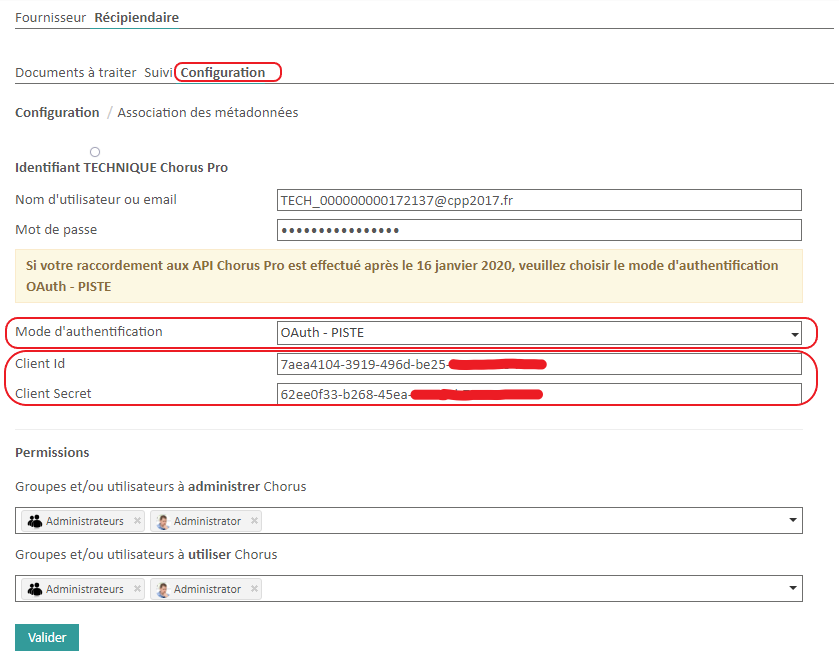
Select the ” OAuth – TRACK ” authentication mode, insert the OAuth credentials from the production TRACK application, and validate.
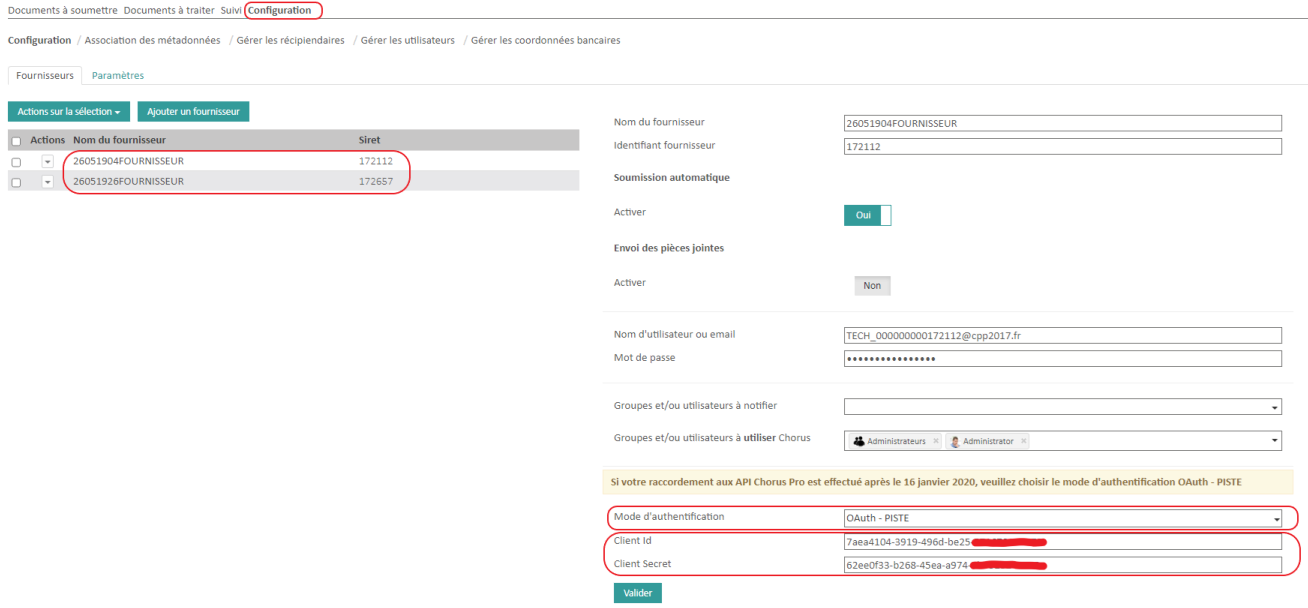
For security reasons, AIFE recommends creating OAuth identifiers for each structure. If you have multiple structures, repeat these steps for each of them.
Click on “Configuration“, select the “OAuth – TRACK ” authentication mode, insert the Oauth credentials from the production TRACK application and validate.