You then need to specify to Open Bee™ eMail Capture what you want to monitor and automatically file on your email account.
This is done by defining rules. You have to define at least one rule on an email.
Click on the “Rules” tab and then on the “New” button:
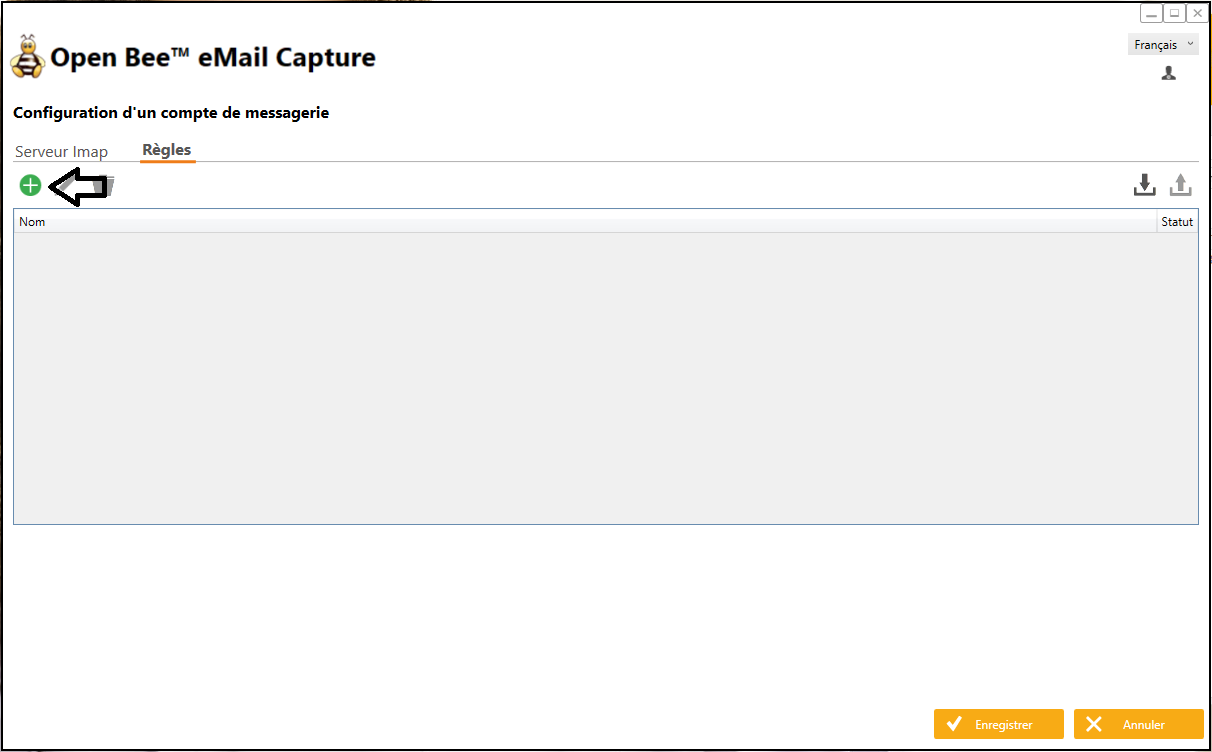
- First, give the rule a name that is being created.
- By default, a new rule is active, you can deactivate it later if you consider this rule obsolete but want to keep a history.
A rule is divided into 4 main sub-parts:
Source Tab
The “Source” tab allows you to define which folders in your email account the rule will apply to (e.g. Inbox, Sent Items, etc.).
Only emails contained in these folders will be processed by Open Bee™ eMail Capture.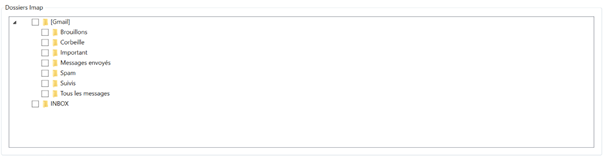
Conditions tab
The “Conditions” tab allows you to filter the emails within the previously selected folders.
These conditions allow you to test the different information contained in the header of an email.
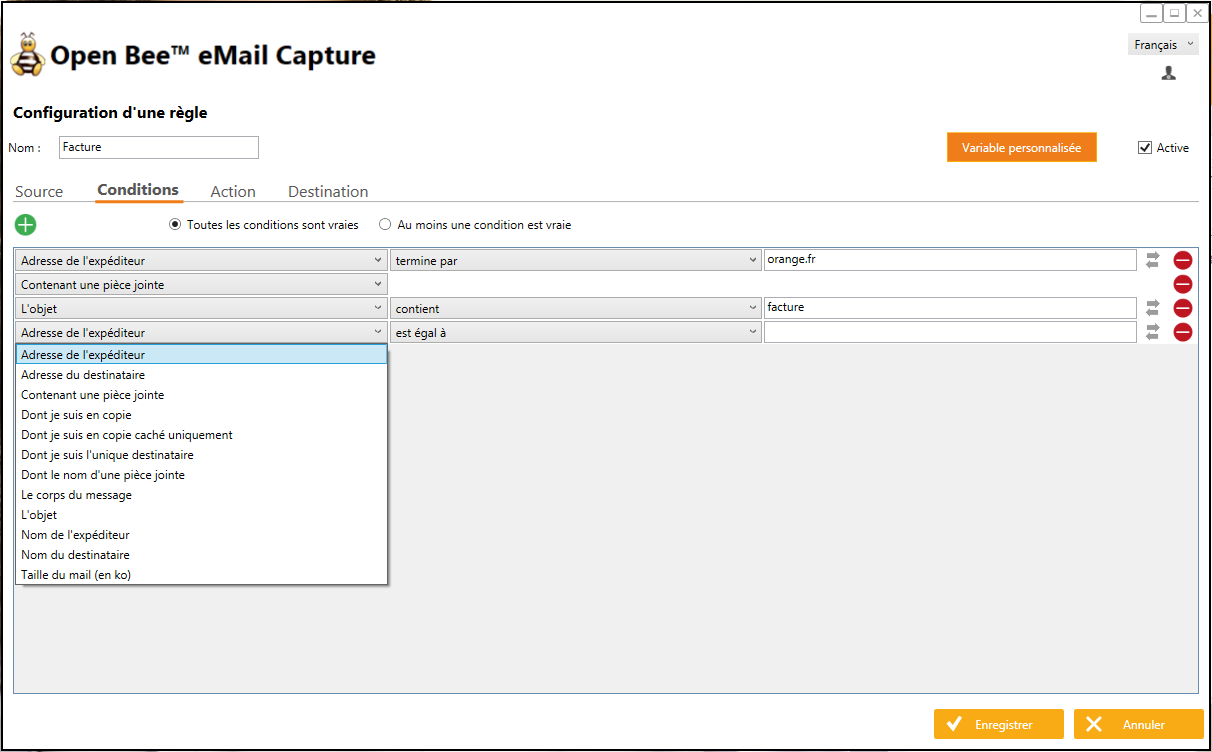
- You can add multiple conditions
- There are 2 modes: either all the conditions must be checked for the email to be processed, or at least one of the conditions must be checked
- Double arrows allow you to test a variable instead of testing free text. You must have previously created the variable (see chapter “Custom variables”)
- If no conditions are set, all emails are considered valid
It should be noted that to verify the conditions, only the header of the email is downloaded except when a condition is placed on “the body of the message”. In this case, it will cause the additional message body to be downloaded. On big volumes, this may cause a slight drop in performance. It is best to insert this condition only if it is really necessary.
The condition “Whose name of an attachment” also implies the condition “Containing an attachment”. This means that this condition will be evaluated as “False” for all emails that do not contain an attachment.
Actions tab
The “Actions” tab allows you to choose what you want to do on a validated email:
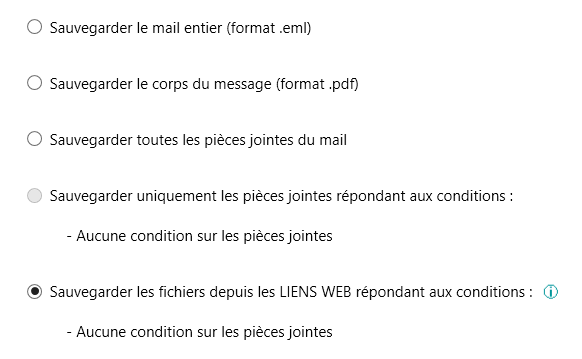
- Save the email identically in “.eml” format.
This is a generic format that is read by all email clients. The email is saved with its attachments. - Extract the body of the email and convert it to PDF (more information)
Attachments are not kept…
- Extract and save only email attachments
- Extract and save only the attachments from the email taking into account the conditions entered on the attachments on the previous tab.
This option is available only if a condition on an attachment has been set.

For example, if this condition is set and the last action is chosen, all attachments except the “.jpg” will be processed.
- Extract and save files that would be stored in a public web link. The web link must allow you to download the file directly without having to authenticate or click on a link.
Destination Tab
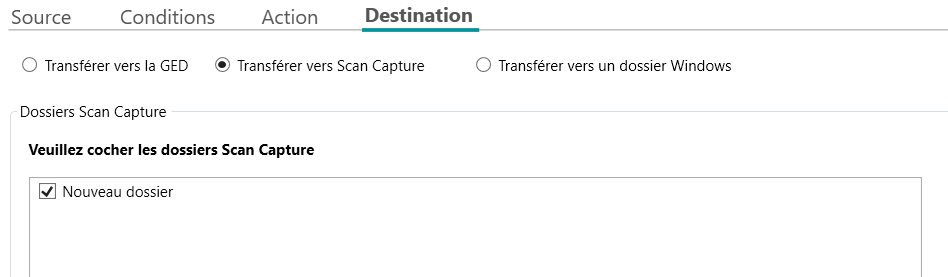
The “Destination” tab allows you to choose where the extracted emails and attachments will be saved:
To a Windows folder
Validated emails or attachments from these emails are copied to the selected output directory.
The files are named in the format described below:
- Email: {IMAP Folder Name}_Email_{Email Number}.eml
- Attachment: “Attachment Name”
To a Scan Capture folder
Validated emails or attachments from those emails are copied to the selected Scan Capture folder.
To Open Bee™ Portal
It is possible to forward emails directly to the Open Bee™ Portal solution. To do this, you must have configured the connection to the EDM (see chapter “EDM connection” tab).
First, you must select the ranking rule present in Open Bee™ Portal. It is possible to use an existing rule or to create a specific one for the classification of emails. Open Bee™ Portal will then be in charge of classifying and renaming the email according to the configuration of the ranking rule.
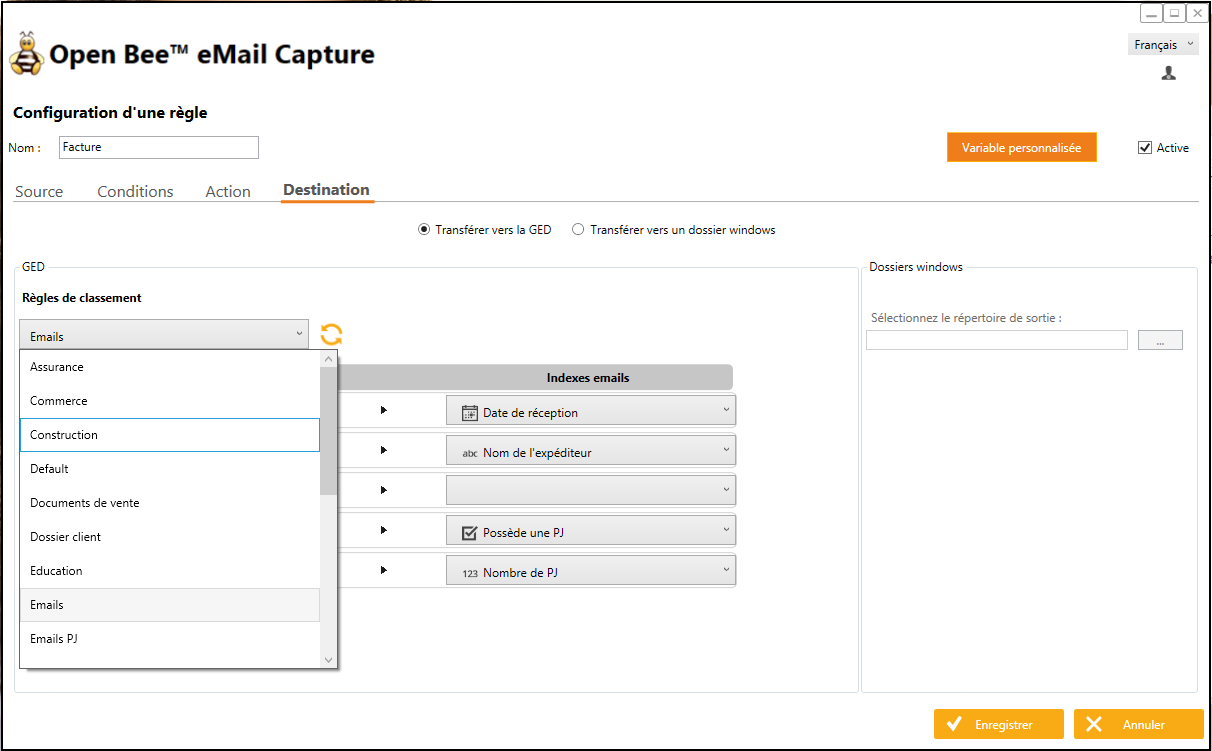
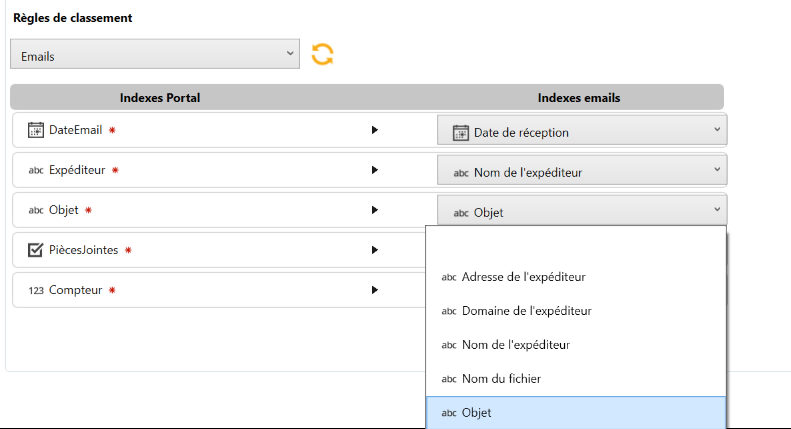
Then you need to match the Open Bee™ Portal indexes (located in the left column) with the extractable email indexes (located in the right column).
A red star indicates whether the index is required for the ranking rule to function properly.
Email indexes
The information extracted from the header of an email that can be used is as follows:
- The name of the email
- IMAP folder name (name of the folder of the email account from which the email originated)
- The subject of the email
- The date of receipt of the email
- The time the email was received
- The sender’s address
- The name of the sender
- The domain of the sender’s address
- The address of the primary recipient
- The name of the primary recipient
The recipient is the email account configured in the “Imap Server” section. If it is not present (the recipient is a group for example), the first recipient found is returned. - The names of all recipients
- The addresses of all recipients
- The address domains of all recipients
- Email ID (email number in the IMAP folder of the email account)
In a “Full Email Extraction” or “Email Body” context
- The file name in the format “{IMAP Folder Name}_Email_{Email Number}.eml“
- The number of email attachments
- The position of the attachment (not applicable)
- Has a PJ (Boolean returning “True” if the email contains an attachment and “False” otherwise)
- File ID (same as email ID)
In an “Attachment Extraction” context
- The name of the attachment
- The number of the attachment in the email
- The position of the attachment in all the extracted parts (e.g. “2/5”)
- Has a PC (Boolean returning “True”)
- File ID (ID of the email_ position of the attachment in the email’ => example: 29_1 or 29_2)
Astuteness
It is possible to create additional indexes if there is a more specific need (see the chapter “Custom variables”)
Once the indexes have been matched, it is possible to save the rule by clicking on the “Save” button.
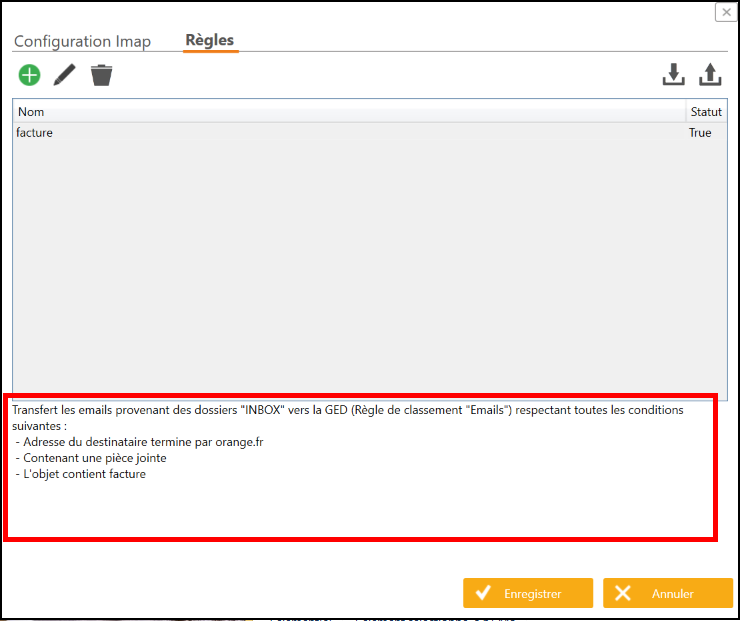
A brief summary of the rule can be viewed directly from the list of rules of an e-mail service.