A wizard, displayed when the application is first launched, allows you to configure Open Bee™ Sync simply and quickly .
This wizard is broken down into several steps.
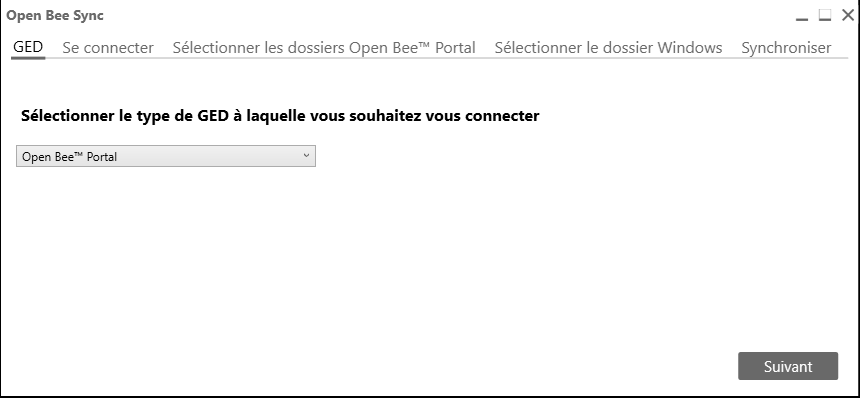
Choice of DMS type
The first step is to select the type of DMS to synchronize.
The steps that follow will be different depending on the choice made.
Connection
Open Bee™ Portal
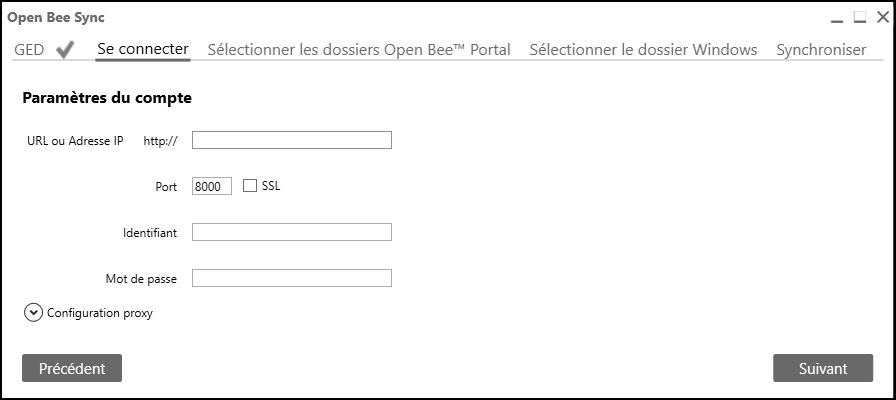
Logging in to Open Bee™ Portal is done by entering the address, username and password.
Sphere
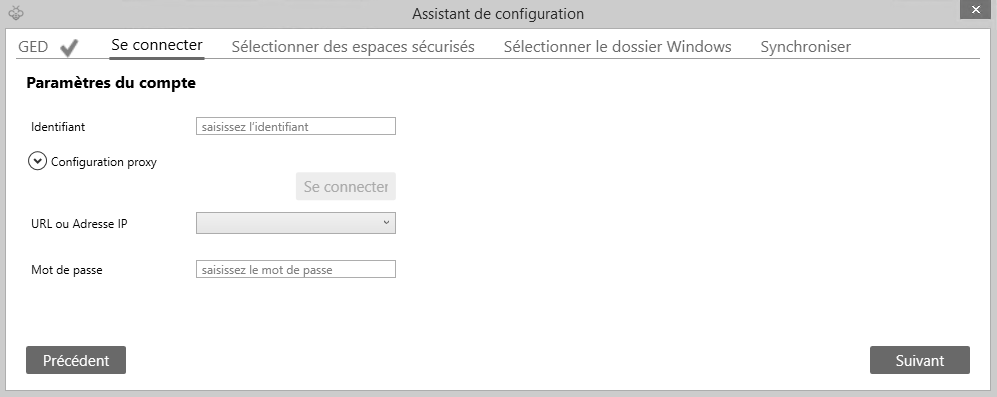
UnlikeOpen Bee™ Portal, logging in to a Sphere first requires entering the login, then clicking on “Login” before entering the address and password.
Folders to sync
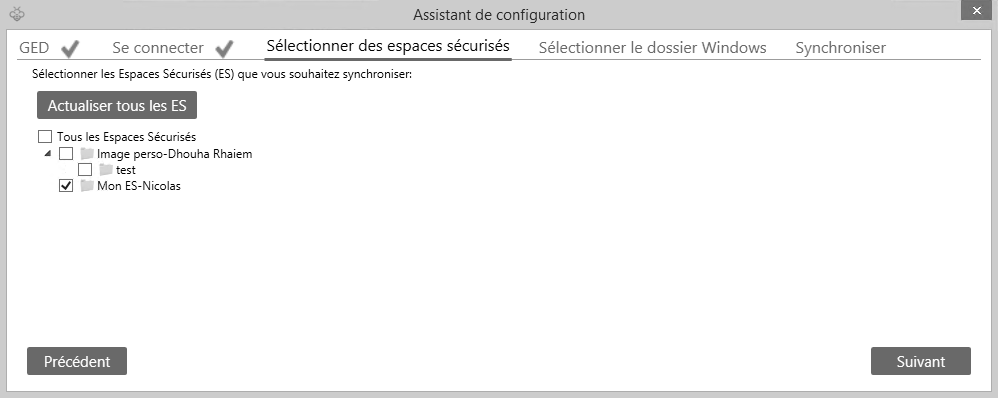
Depending on the type of DMS to be synchronized, this step allows you to either selectOpen Bee™ Portal folders or Secure Spaces (Spheres).
Open Bee™ Portal
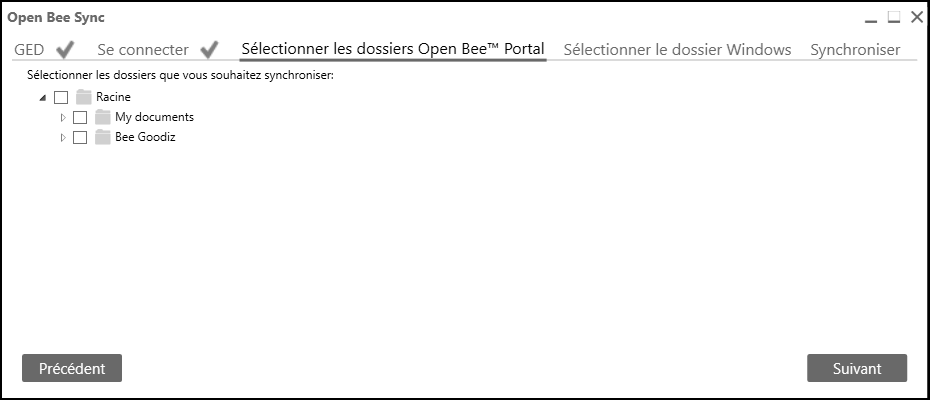
Note : When selecting a folder from the wizard, all top-level folders are automatically selected.
Which means that the files in these folders will be synchronized. (Example: Syncing the Bee Goodiz folder will also sync the files in the ‘Root’ folder.)
It is possible to modify this behavior to not synchronize files in top-level folders by going to the Sync configuration after passing all the steps of the wizard.
You must select the source directory to be synchronized from the “Advanced settings” link in the “Synchronization” tab.
Sphere
Windows Folder
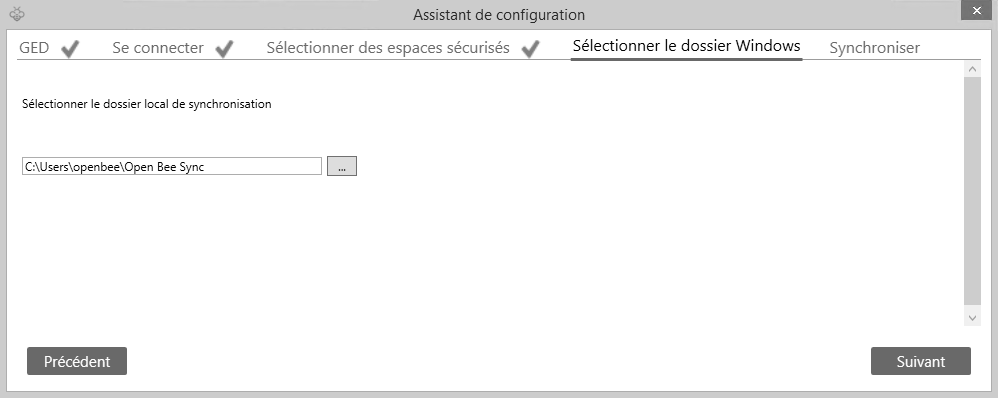
This step consists of selecting the Windows folder in which the documents from Open Bee™ Portal or the Secure Spaces (Spheres) will be synchronized.
Synchronization Options
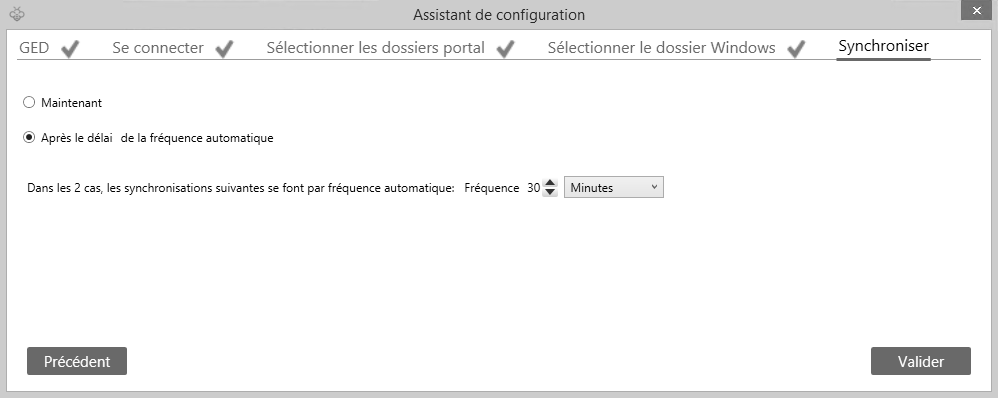
A first option allows you to define whether the synchronization is carried out directly when the “Validate” button is clicked, or only after the synchronization time.
A second option allows you to set the synchronization frequency.