View Tasks
You can access your tasks via the “To Process” button in the menu.
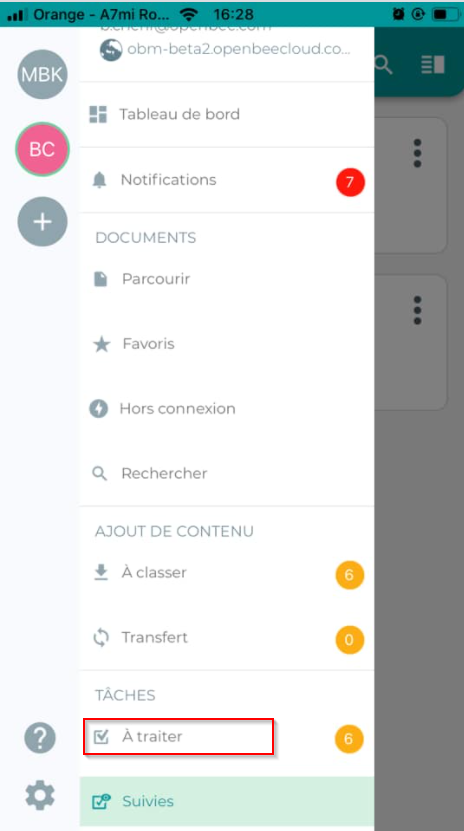
This interface presents the list of tasks assigned to you:
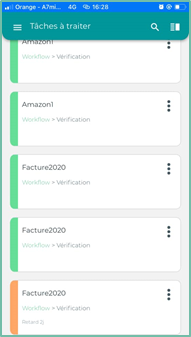
You can reorganize your list using different tools:
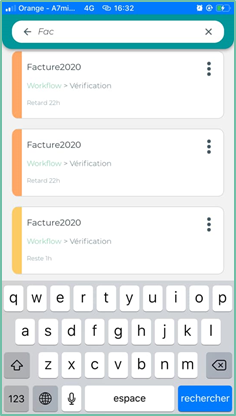
Find the name of a task
Click the search icon to initiate an instant search on the name of a task in the list
Filter tasks
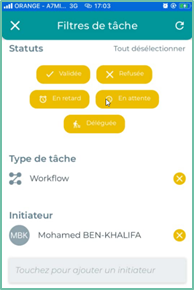
You can customize the filters for your tasks by displaying a particular category of tasks:
To do this :
- Click on the button at the top right of the interface

- Click on the ” Customize Filters ” button
- Choose the statuses : Approved, Denied, Overdue, Pending, Delegated
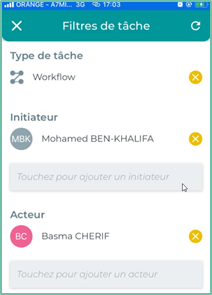
- Select the type of task : Workflow or task
- Select the task initiator
- Select the actor of the task
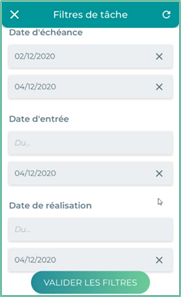
- Set the dates :
- Due date
- Date of entry
- Date of completion
- Click on the ” Validate Filters ” button
Sort tasks
Different sorting options are available. You can sort by task name, action item, and due date.
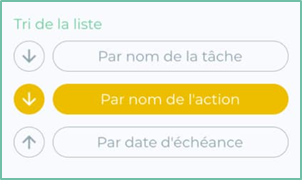
Actions on the tasks to be processed
Various actions can be performed on the buttons from the ” To be dealt with ” :
Click the  to the right of the task name to display the list of actions
 |
Re-launching the actor : A new email notification will be sent to them |
 |
Change the assignment : Choose a new actor for the task |
 |
Purge Task : The task will be considered refused |
 |
See the comments : View and add comments on the task |
Click on a task to proceed to the “Process a task” step.
Dealing with a task
View your task
To view a workflow task assigned to you, please select it from the list.
The following view allows you to do the following:
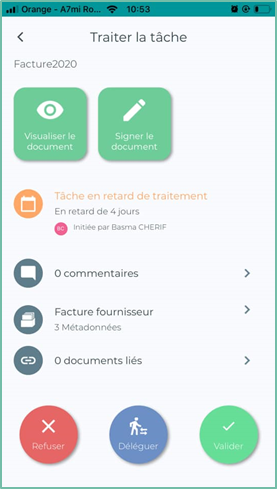
Interface Description:
The Eye Icon  allows you to view the document.
The  allows you to initiate the signing process (see below section “Sign your document”).
 Status : “Pending”, “Overdue”, “Validated” or “Denied”.
Actions
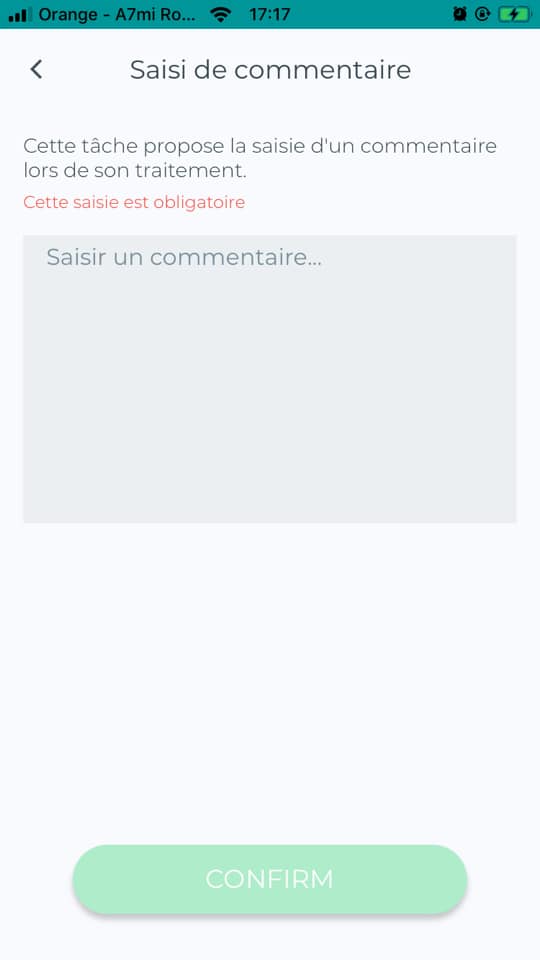
Entering a comment
By clicking on the comment icon  You can see the number and comments associated with the document as well as add new ones either in case of “validation”, ” refusal”.
Entering Metadata Values
By clicking on the  You can view the filing rule and metadata associated with the document, you can also edit the metadata.
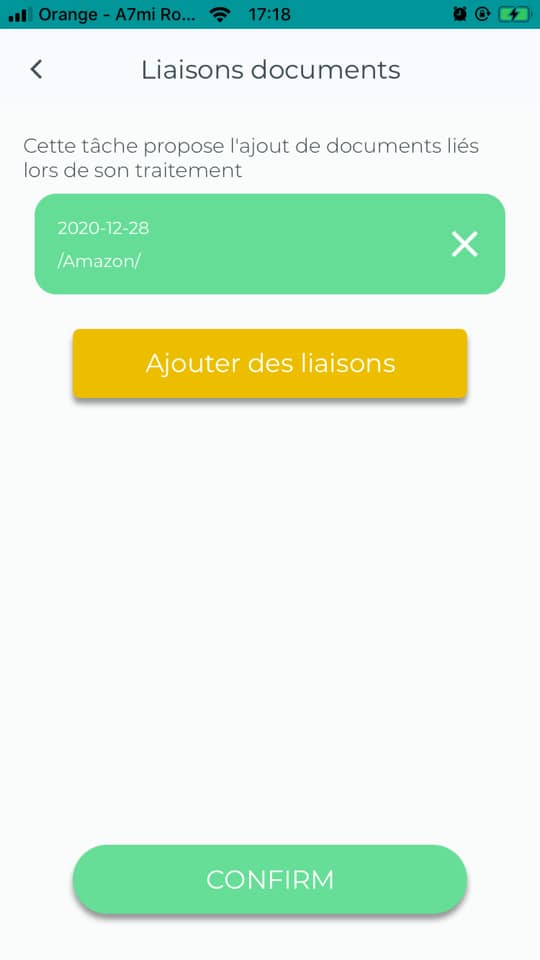
Liaison
By clicking on the  you can see the number of linked documents as well as add a link to other documents present in the DMS in case of “validation”, “Refusal”
Apply a cursive signature when committing a task
The Open Bee™ Mobile app allows you to cursively sign your documents associated with a workflow task.
The button allows you to initiate the signing process
Place a cursive signature manually
The first step is to sign it. The following view allows you to draw it tactilely:
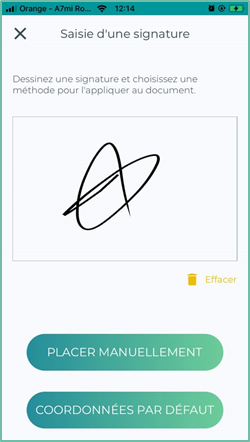
Once your signature is entered, click on the ” Place Manually ” button.
A new view appears allowing you to move the signature wherever you want on the document:
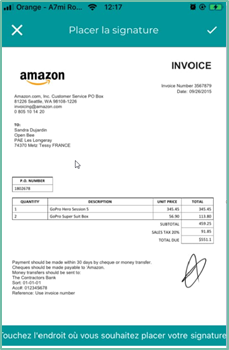
When you’re happy with the placement of your cursive signature, validate the view. The signature is now pre-saved on the document.
Default contact information
Default coordinates: refers to the location of the preconfigured signature in the Open Bee portal in the “Apply a cursive signature” section
Validate or reject your task
You can process your task using the “Validate” buttons, ““Delegate” and “Decline” at the bottom of the view.
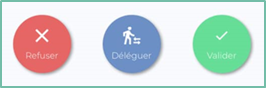
The Delegate button: allows you to delegate the task to another actor
The following view displays information related to the delegated task:
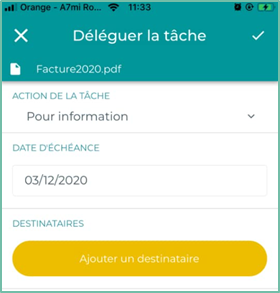
If you want to change the action of the task, click  and select an action from the drop-down list.
Click the ” Add a recipient “ to select the new actor of the task and then validate 
In the case of a conditional workflow
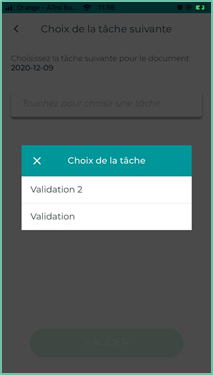
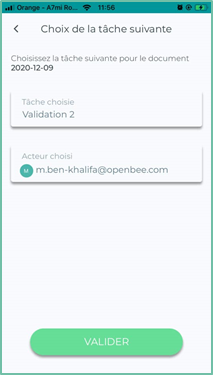
In the case of a conditional workflow, theOpen Bee™ Mobile application may ask you to choose the path of the document and the actor for the next task(s).
This results in a new view :