Expense Management
View the list of expenses
The list of your expenses is displayed in the “My expenses” tab of the Open Bee™ Notes de frais module.
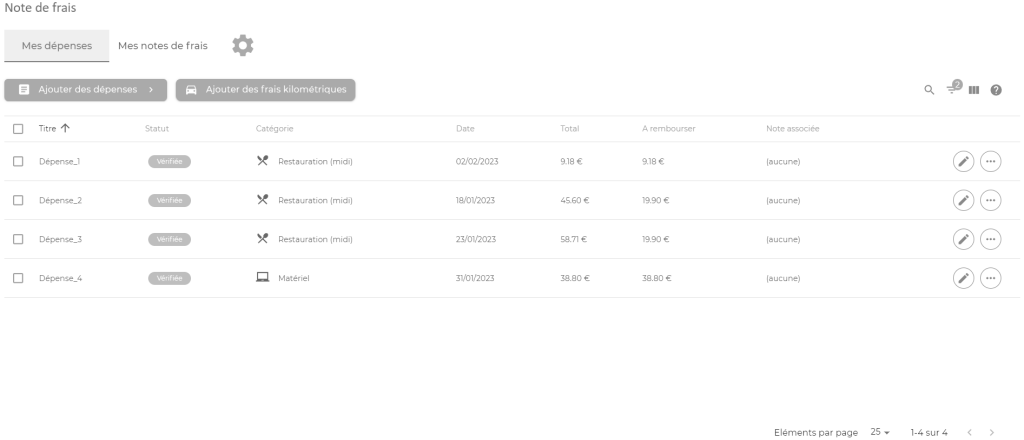
In this screen, each line corresponds to an expense.
Two buttons allow you to add expenses or mileage expenses.
At the top right of the list, there are four buttons that allow you to act on the list:
 : Allows you to search through your expenses. The search is done on the title of the expenditure.
 Please note that the search takes into account your filtering and sorting settings from the list.
 : Allows you to filter your expenses according to several criteria (status, categories, date, etc.)
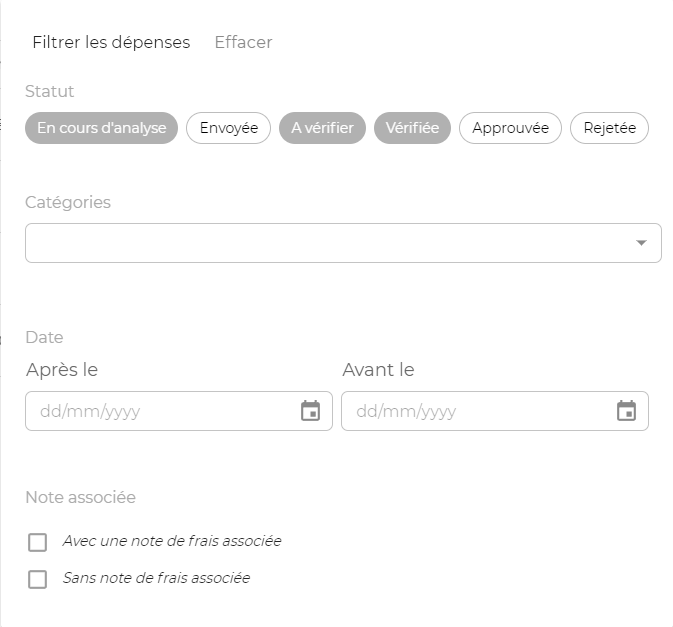
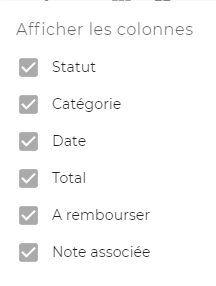
 : Allows you to choose which columns to display in your expense list.
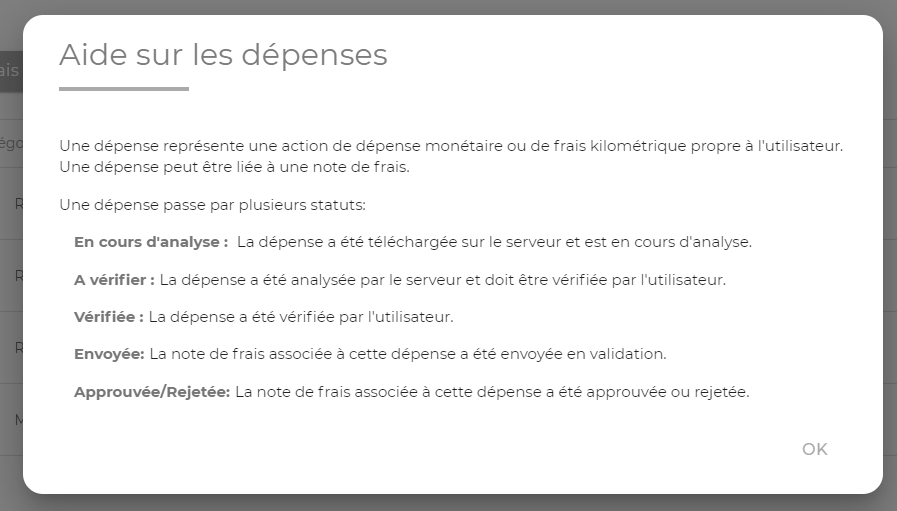
 : Allows you to access help on expenses, explanation of expense statuses, etc.
Actions on expenses
Each expense line has a button  that allows you to display the actions available for the expense.
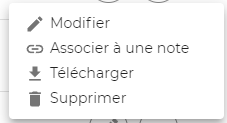
The actions available depend on the status of the expense.
The “Edit“, “Unlink from note” and “Delete” actions are not available if the expense has a status of “Submitted” or “Approved“.
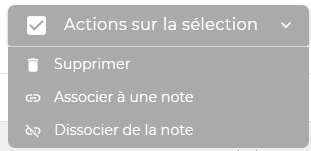
Each row also has a selection  box. If at least one item is selected, a new “Actions on Selection” button appears at the top of the list and allows you to perform an action on each selected item.
View an expense
To view an expense, you can either click on the expense title or click on the view/edit  button to the right of each expense.
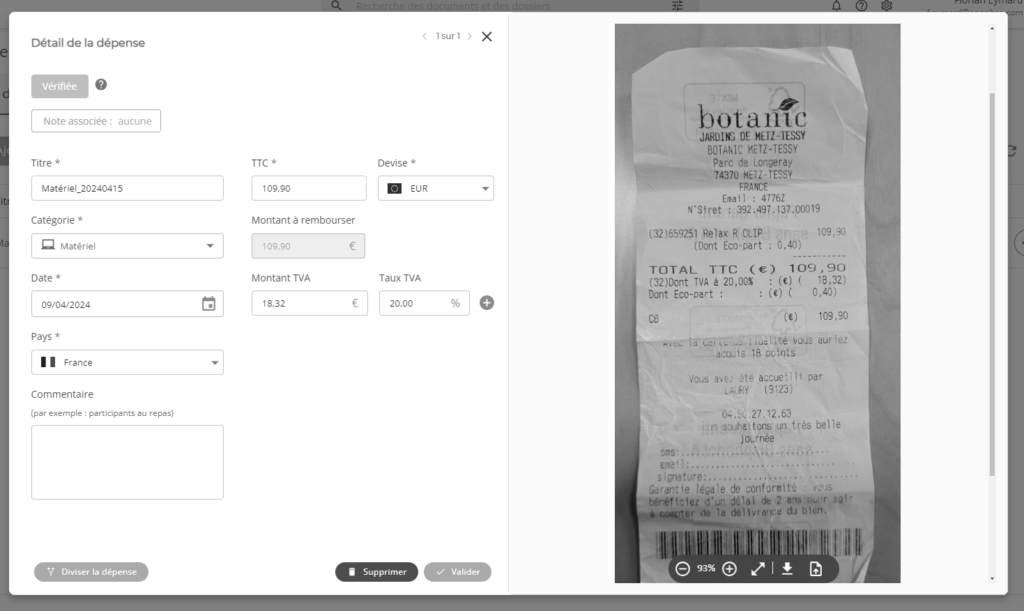
This screen allows you to view the complete information of the expense as well as view the associated receipt. Depending on the status of the expense, you will be able to modify this information as well as the receipt.
At the top right of the screen, arrows  allow you to move to the next or previous expense in the list.
The button  allows you to save the changes made to your expense.
In addition, it allows the expense to be upgraded to the “Verified” status (thus allowing it to be sent for validation) provided that:
- All required fields are completed
- Proof is associated with the expense
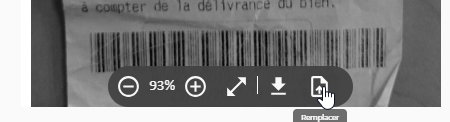
If you want to change the receipt associated with the expense, click on the “Replace” button in the viewer toolbar on the right:
Add expenses
There are three options for adding expenses from the “My Expenses” tab:

- “Add Expenses” → “Manual Entry“: Allows you to add a single expense by manually entering its data.
- “Add Expenses” → “Auto-Recognition“: Allows you to add one or more expenses that will be sent to the Auto-Recognition server.
- “Add Mileage Expense“: Allows you to create a new mileage expense.
Add an expense by manual entry
This method allows you to create a new expense by manually entering each of its information.

You can add a receipt by clicking on the “No associated receipt” area or by dragging and dropping the supporting file from your computer.
You can also associate the expense with an expense report by clicking on the “Related note: none”  box.
box.
The “Currency” field is selected by default on the currency configured for your company.
The “Converted Including Tax” and “Exchange Rate” fields will only appear if the selected currency is different from the one configured for your company.
Capped Category
If the category chosen for the expense has a limit, and the “TTC” field exceeds this limit, then the “Amount to be reimbursed” field is automatically reduced to the value of this limit.
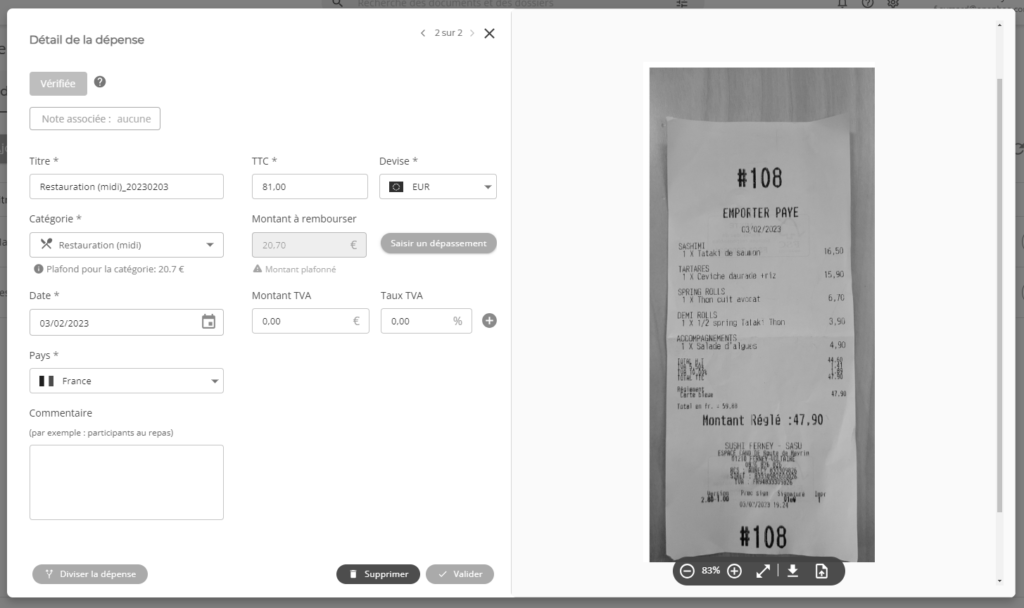
However, you can request that this limit be exceeded using the “Enter an exceeding” button. If you click on this button, the “Amount to be refunded” field is automatically reduced to the value of the “Including VAT” field. It also becomes editable to enter a custom value.
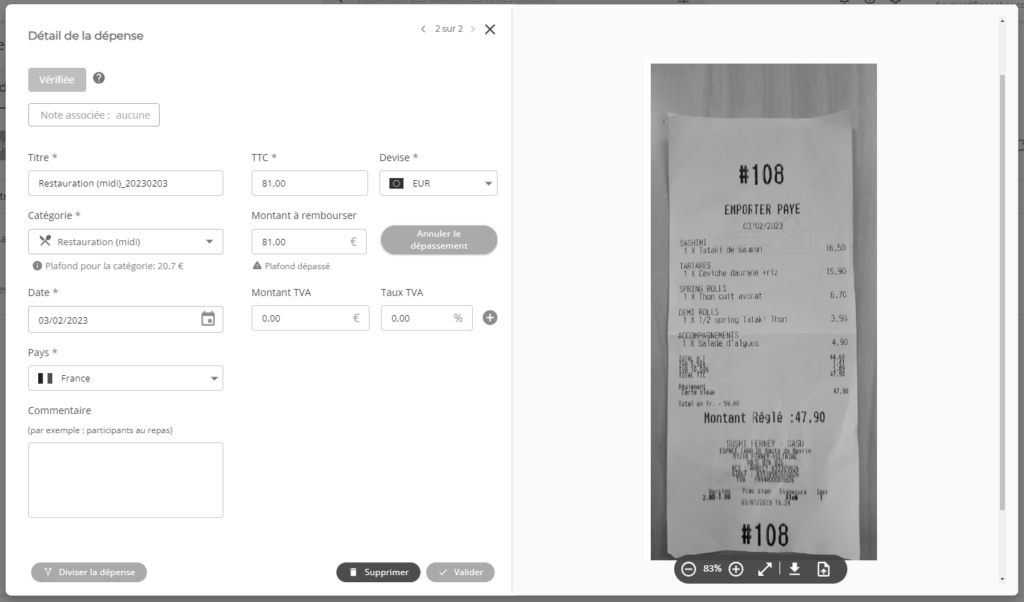
You can cancel this overage at any time by clicking on the “Cancel overage” button.
Add multiple expenses by automatic recognition
This method launches a wizard that will guide you through the steps of adding one or more concurrent expenses.
Step 1
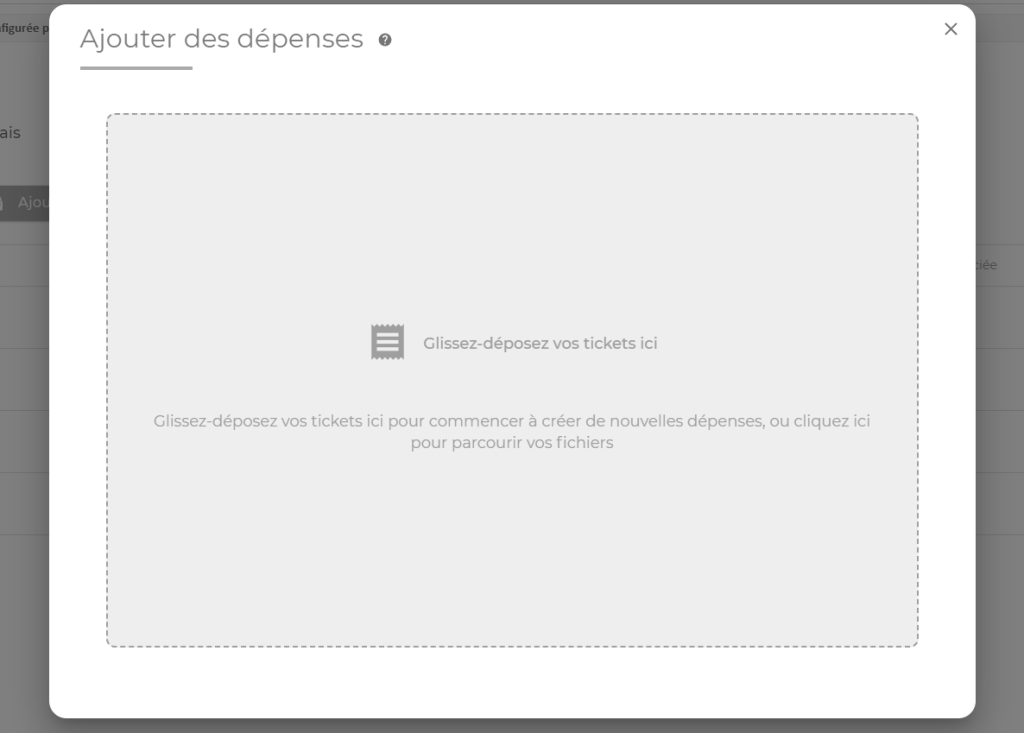
The first step is to upload your expense receipts to Open Bee™ Notes de frais . To do this, click on the central area to choose your files, or drag and drop these files from your computer to the central area.
Once your files have been chosen, they are sent to the server. You can track the progress of the upload using the screen.
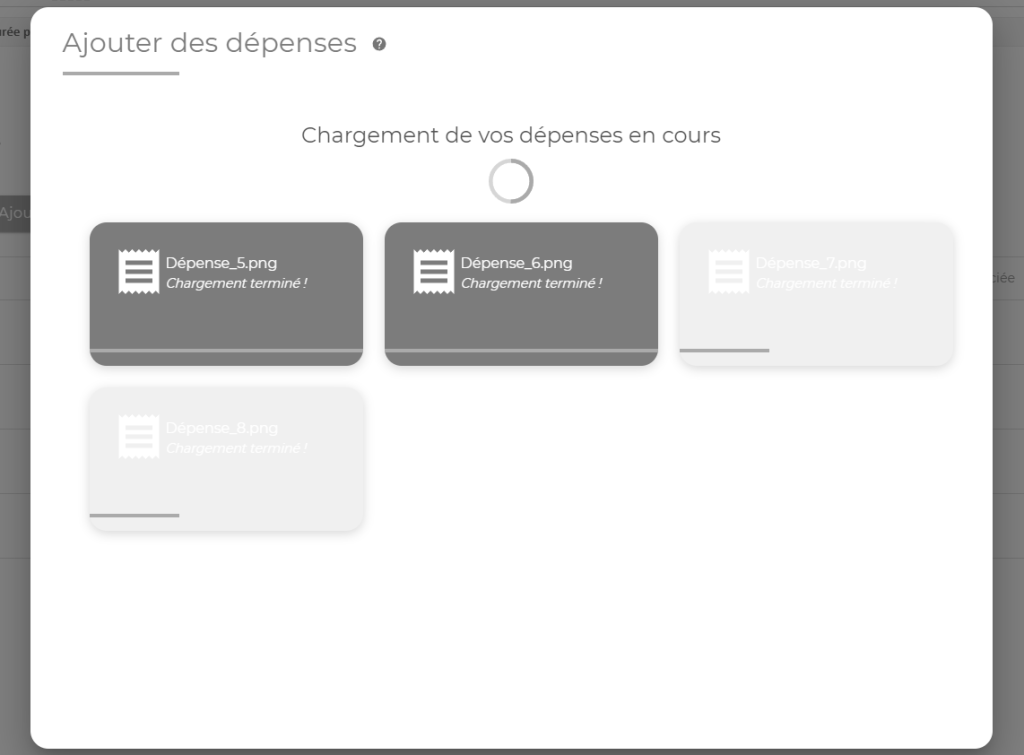
Step 2
When the upload is complete, the wizard offers you to associate these expenses with an expense report.
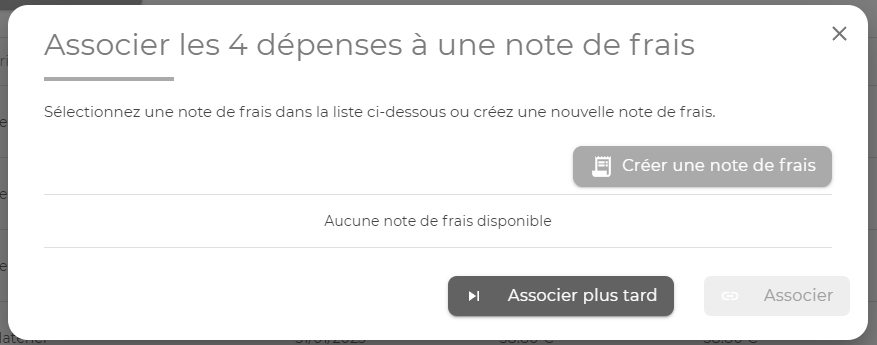
From this screen, you can associate uploaded expenses with an existing expense report by choosing it from the list, or create a new expense report using the “Create expense report” button.
Step 3
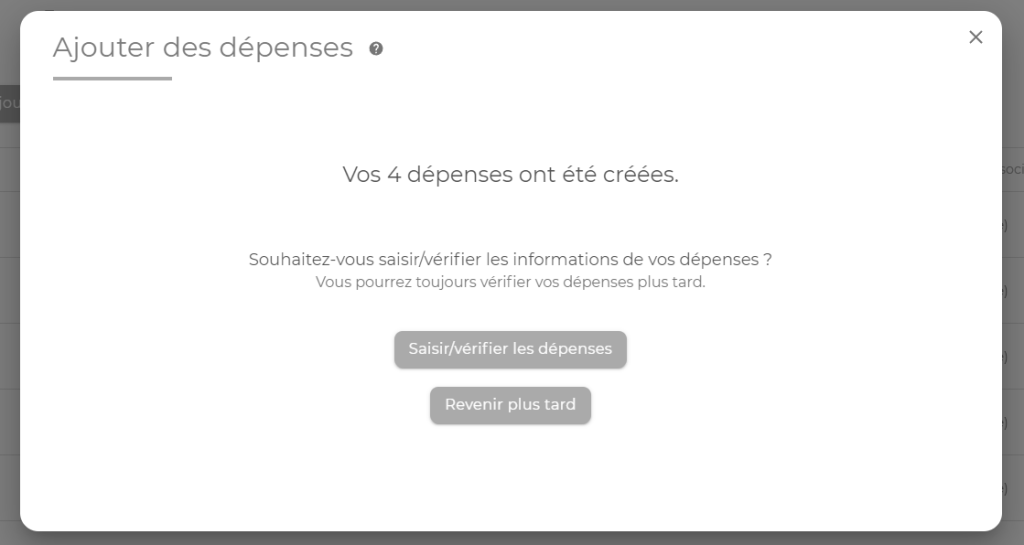
The final step of the wizard gives you two options:
- Enter/Review Expenses : Allows you to access the first expense detail screen. This allows you to check the automatically recognized values, enter missing or erroneous values, and then post the expense to display the next expense detail screen.
- Come Back Later : Allows you to return to the list of expenses. You can check the expenses later.
Splitting an expense
The “Split an expense” feature allows you to create several expenses of different categories from the same receipt.
To access this feature, click on the button  on the detailed interface of an existing expense. The existing expense must have one of the following statuses for the button to appear: Reviewing, Reviewing , or Verified.
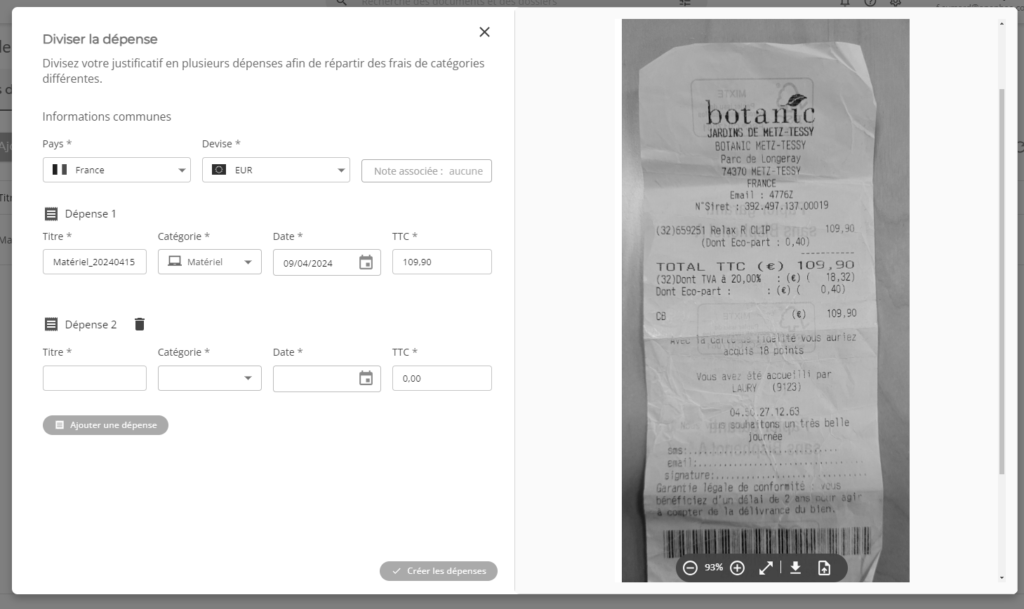
This interface allows you to define the information common to each of the expenses that will be created, as well as their specific information.
Clicking the button  will create an expense for each expense configured in this screen. Each expense created will have the same proof as the original expense.
Please note that no parenting links are maintained between the expenses thus created.
Add mileage charges
This method allows you to declare new mileage expenses through the completion of a journey.
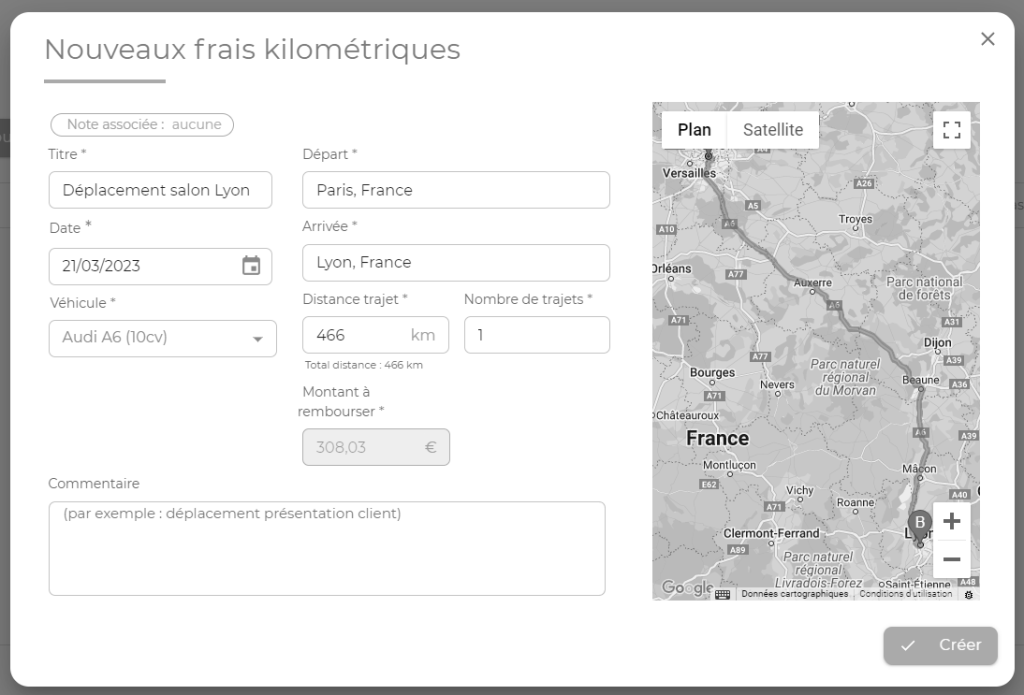
The distance calculation of the journey is carried out automatically once the start and end address have been entered.
The amount to be reimbursed depends on the distance travelled and the fiscal power of the vehicle used.
The “Number of trips” field allows you to set the number of times you have taken this specific trip. For example, in the case of a round trip, enter “2“.
Add a new vehicle
To add a new vehicle, go to the configuration using the button  to the right of the “My expense reports” tab.
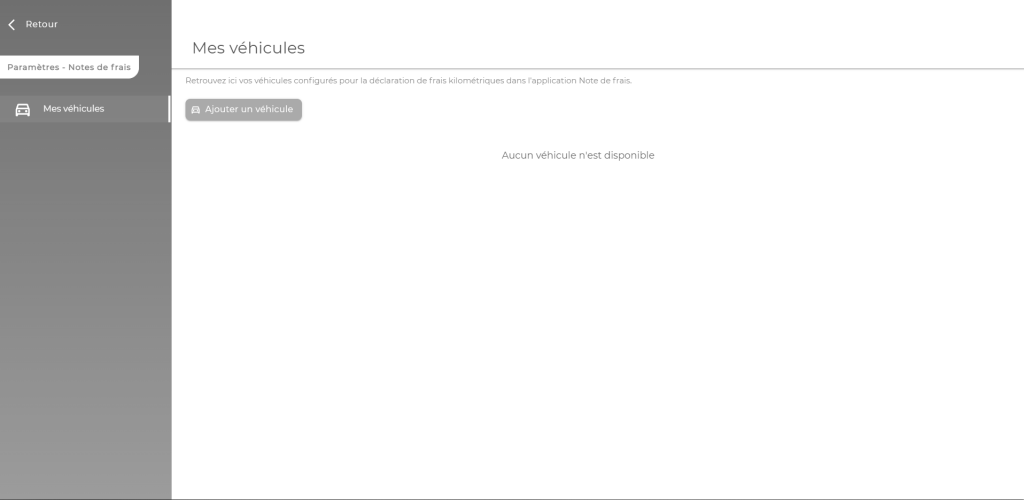
In the “My Vehicles” tab, click on “Add Vehicle“.
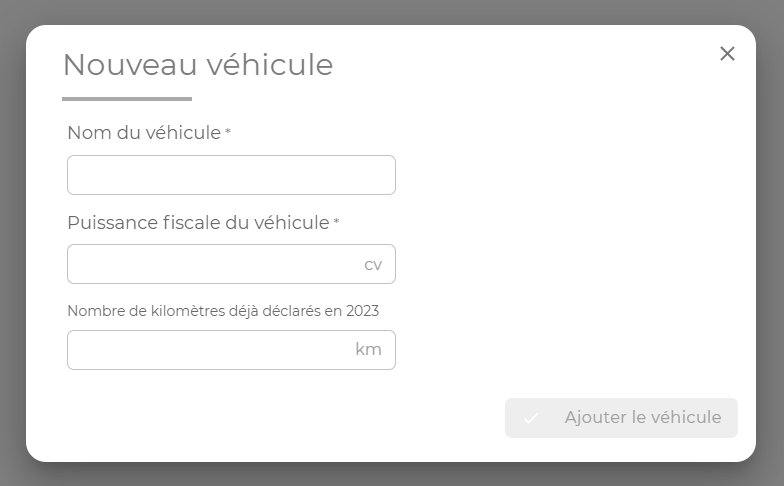
Enter your vehicle information and click “Add Vehicle“.
Your vehicle can now be used in the mileage expense declaration.
Calculation of mileage allowances
The calculation of the amount to be reimbursed for your mileage expenses is annualized. This means that it depends on the mileage expenses that you have already declared for the year in question.
For example, if you declare a mileage expense in March 2023, the calculation will be based on all mileage expenses declared since the beginning of 2023.
In addition to being annualised, the calculation takes into account the vehicle used. This means that two different vehicles have their own annualized mileage cycle.
For example, if in 2023 you drove 3000 km with vehicle A and 4000 km with vehicle B, this does not represent 7000 km in total. If you drive another 1000 km with vehicle A, the calculation will take into account a total of 4000 km.
The scale for calculating mileage allowances therefore depends on the distance travelled over the year and the fiscal power of the vehicle used. Here is the 2023 scale for calculating mileage allowances:
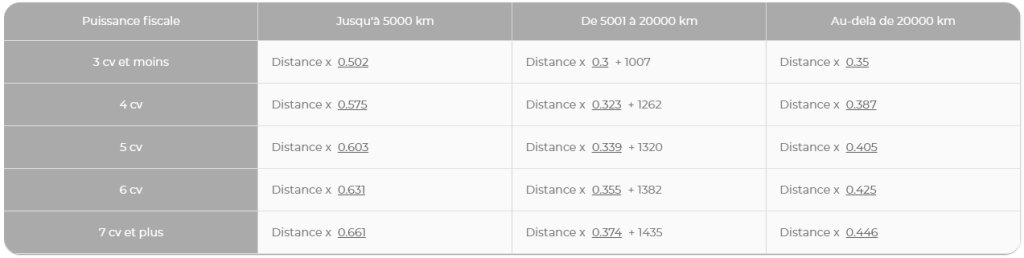
The scale does not apply per trip, but with regard to the entire distance travelled for the vehicle over the year.
The calculation can be summarized as follows:
Amount to be reimbursed for new journey = ((d * coeff) + flat rate) – <amount already declared>
d = total distance travelled with this vehicle in the year of the new trip
coeff = coefficient according to the distance d and the fiscal power of the vehicle
flat rate = flat rate applicable for the column “From 5001 to 20000 km”, otherwise 0
Let’s take an example:
- Your vehicle A (6 hp for tax purposes) has already driven 3000 kilometres in 2023. You have received mileage allowances for these declared distances:
- You are in the first bracket (“Up to 5000 km”). The coefficient is therefore 0.631.
- Calculation: 3000 * 0.631 = 1893 €
- You wish to declare a new 500-kilometre journey for the same vehicle in 2023:
- You are still in the first bracket because 3000 + 500 = 3500 km. The coefficient is therefore still 0.631€/km.
- Calculation : (3500 * 0.631) – 1893 = 315.5 €
- The amount to be reimbursed for your new 500 km journey is €315.5
- Declare a new 2000-kilometre trip for the same vehicle in 2023:
- You change the bracket because 3500 + 2000 = 5500 km. The coefficient becomes €0.355/km and a flat rate of €1382 is added to the total of your reimbursements.
- You have already received €2208.5 for the 3500 km already travelled.
- Calculation : ((5500 * 0.355) + 1382) – 2208.5 = 1126 €
- The amount to be reimbursed for your new 2000 km journey is 1126 €