The text, CSV accounting import allows you to import the chart of accounts or the analytical plan of a file from a file.
Spring
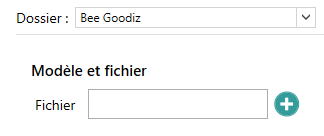
The import is for a particular folder to be chosen from the list of Open Bee™ Scan Capture.
- First, choose the file you want to import
- The option to delete the chart of accounts allows you to purge items that are no longer present in the chart.
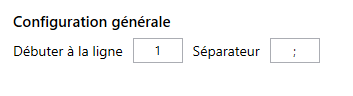
General Setup
These parameters are common to the import model, whether for analytical or accounting import.
Start Line : Starts at a specific line in the file and avoids header lines. By default the value is 1, no rows are skipped.
Separator : The column separator in the case of a CSV file.
Special separators: Tab and spaces can be used via the TAB and SPACE separator constants
Import Type
The import type allows you to choose between the Chart of Accounts import and the cost plan import. Depending on the type of plan to be imported, specific options are available.
Chart of Accounts Import
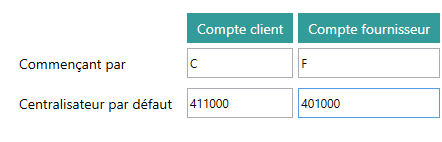
The chart of accounts import allows you to filter the accounts to be imported, so that only those used to generate accounting entries are retrieved. Each type of account (customer, supplier, VAT, charges), can be filtered by the first characters of the account number as in the following example:

It is possible to define multiple account starts by separating them with “;”.
Special case: The filters applied to accounts receivable/payable apply to the master account, except in the case where the customer/supplier account number is entered in the same column as the G/L accounts.
Often in this position, the centralizing accounts are not present in the source file. It is then possible to fill them in by default:
Analytical plan import
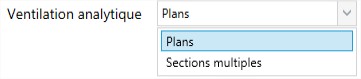
In the case of analytical import, the only possible option will be the type of import: by plan, or by section.
Document Structure
The structure of the document is also different depending on the type of import chosen. It is this section that will define the order of the columns expected during the import. These columns are therefore different depending on whether we expect analytical sections or accounting accounts.
It is possible to add/remove them with the “+” and “-” buttons that appear when hovering over the column, to rearrange them by drag & drop, or to change their values. Columns that correspond to ignored values within the file are represented by a single line.
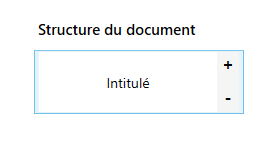
Accounting import columns:
- Account Number
- Party Number
- Third-party and G/L account: When the business partner number and account number are located in the same column.
- Entitled
- VAT Rate: Populates the decimal value associated with the VAT accounts (optional)
- Additional Information (Available from version 3.4.0): Identifies a column as additional information for the account being imported. When choosing this column, a text field appears to fill in the key corresponding to the additional information being imported. This key will be used to designate this information in the rest of the application
Analytical import columns:
- Title of the plan (if broken down by plan)
- Plan code (if broken down by plan)
- Group name (if broken down by section)
- Section Title
- Section Code
For an analytical import, all columns are required
Import option via FTP
File import can be done from 2 sources:
- Local: The user must select the file to be imported during each import by choosing it from the directories of his workstation
- FTP: The user can set up an FTP connection. The file will then be imported from that source. This source is used to use the accounting import schedule.
FTP settings
By selecting the “FTP” source, the file path is replaced by 2 optional input fields.
It’s 2 input fields are used to identify the files to be imported. a file containing the accounts and a file containing the analytical plan.
In the event that the filenames are different for each import, it is possible to use regexes by enclosing them with angle brackets “<” et “>”.
Example: “test-
Be careful, in case several files are identified for the same import type (account or analytical):
– In the case of a manual import: the user will be prompted to select the file they want to import.
– In the case of a scheduled import: The import will be canceled. Only one file must be identified.