Once the workflow has been created and configured, itis necessary to create tasks.
Add a task
From the workflow editing screen, click on the ” Add a task” button
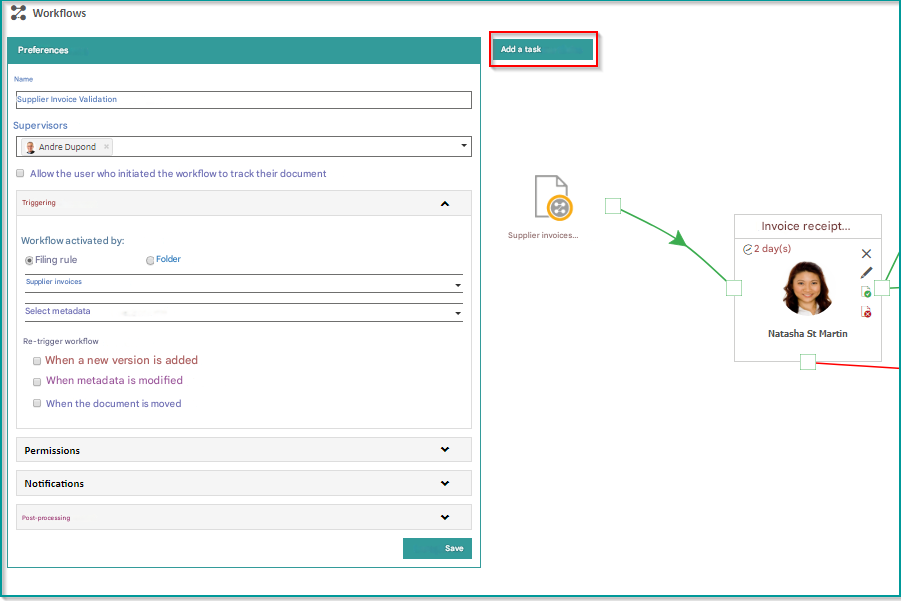
Create a task
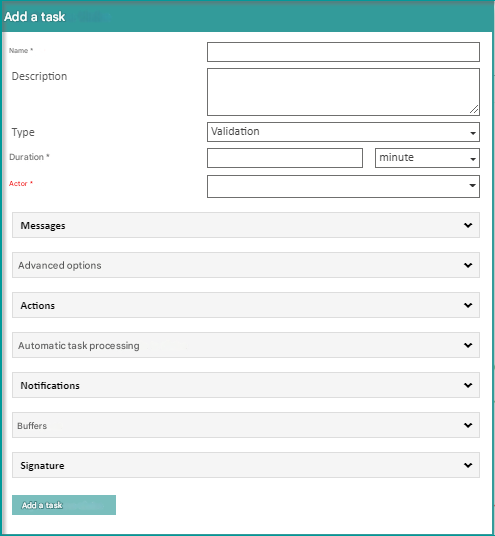
- Name : Enter the name of the task
- Description : Enter the description of the task (optional).
- Type: Choose the action type “Validation” or “Consultation” “Delegation” “External processing”
- Validation: The task can be validated or rejected
- Consultation: The task cannot be refused, only validated
- Delegation: The task cannot be validated or refused, it must be delegated
- External treatment: The task cannot be processed in Open Bee™ Portal, it must be processed by an external application
- Duration: Insert the duration of the task to be performed by the actor (which will be associated with the task later) in minutes/hours/days/weeks or months. This value is used to determine whether a task is completed on time or late.
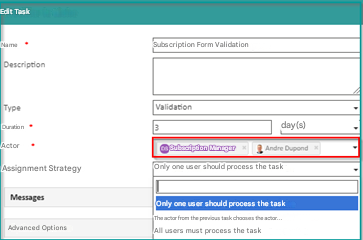
- Actor : Choose the actor of the task from the groups and users of Open Bee™ Portal.You can assign the task to several users which avoids having to create user groups, they will be created dynamically. Note: if you assign the task to several actors, you must choose a strategy to validate this task, i.e.:
- Only one user needs to process the task
- The actor of the previous task chooses the actor of that task
- All users must process the task
Other sections are also available:
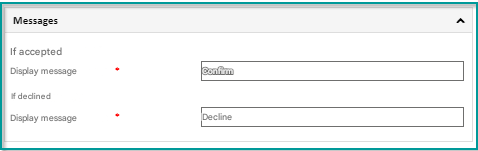
Section: Messages
- In case of acceptance
Display Message: Enter the label of the commit button (displayed when the job is processed).
- In case of refusal
Display Message: Enter the title of the decline button (displayed when the task is processed).
Section: Advanced Options
Reminder before due date
- Set a time limit: Choose a reminder time before the task is due.

- Dynamic Actor : Select metadata from the drop-down menu. It takes into account assignment to multiple users if the metadata contains multiple values. For the “users and groups” metadata type, the administrator can choose whether the task should be assigned directly to the specified user or whether the alias should be applied. (For more information, see the “Dynamic Actor” section below.)
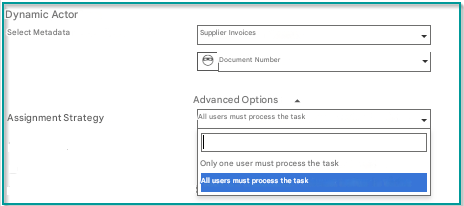
- Click Advanced Options to perform the assignment strategy.
Either:
-
- Only one user needs to process the task
- All users must process the task
- Permissions
It is possible to modify versions and/or delegate the validation of the task by checking the following options:

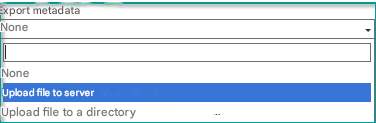
- Metadata export : Allows you to export the metadata of the documents to an export file. This file can then be processed by another software. (Example: Perform an accounting integration in the case of vendor invoice processing.)
- Upload file to server : Select this checkbox to enable the export of metadata in XML format when a document exits the workflow. The exported data is stored on the server, in the “data/workflow/exportXML” subfolder of the installation folder.
- Drop the file into a directory in the EDM: check this box to enable the export of metadata in XML format when a document leaves the workflow. The exported data is stored in a folder in the EDM in case the server is not accessible.
Section: Actions
- Click the Actions button to bring up a list of the following actions:
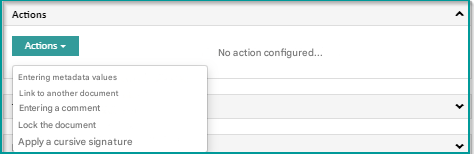
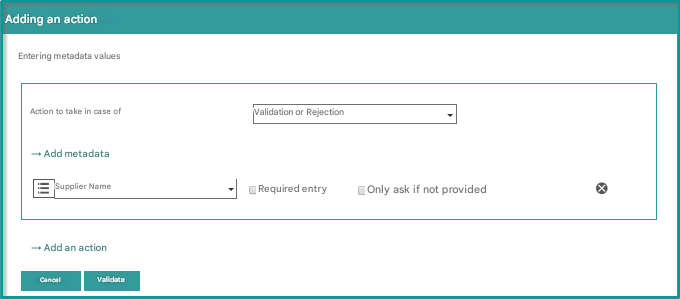
- Entering metadata values
- Choose the action to be taken in case of “Validation”, “Refusal” or “Validation or Refusal”
- Enter the desired metadata and, to add another metadata, simply click ” Add metadata”
- You can also make the Entry required by checking the box
 as you can choose to request the fill only if the metadata field is empty
 - Click Add Action if you want to define more actions.
- Click on Validate
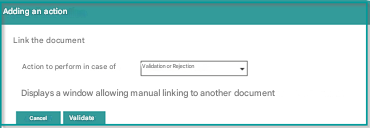
- Link to another document
This interface allows you to require the linking of the current document to other documents in the DMS.
Choose the action to be performed in case of “validation”, “Refusal” or “Validation or Refusal”
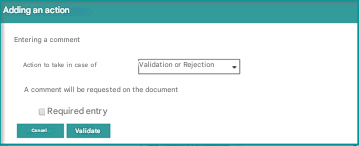
- Entering a commentThe administrator of a workflow can force the user to enter a comment either in case of “validation”, “rejection” or “Validation or Rejection” from the following interface.
- Choose the action to be taken in case of “Validation”, “Refusal” or “Validation or Refusal”
- Check the Required Entry option
- Click on validate
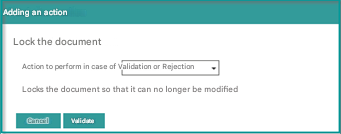
- Lock Document
The administrator of a workflow can decide to force the user to automatically lock the document.
- Choose the action to be taken in case of “Validation”, “Refusal” or “Validation or Refusal”
- Click on validate
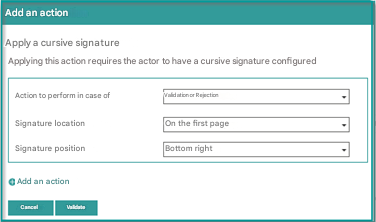
- Apply a cursive signature
When processing the task, the administrator of a workflow can configure the automatic application of the signature of the user processing the task on the document.
The signature to be applied is retrieved from the profile of the user processing the task and is merged on the document in the same way as what already exists for stamps.
No user action is requested. The action is carried out in the background.
To apply the cursive signature, please fill in the following fields:
- Action to be taken in case of : “Validation”, “Refusal” “Validation or refusal”
- Signature Localization : This option allows you to choose where to apply the signature to either ” On the first page “, ” On the last page “, or ” On all pages “
- Signature Position: This option allows you to choose the “Bottom Right” signature position
- Click Add Action if you want more actions.
- Click on Validate
- Automatically change metadata valuesThe administrator of a workflow can force an automatic modification of the metadata either in case of “validation”, “refusal” or “Validation or Refusal” from the following interface.
- Choose the action to be taken in case of “Validation”, “Refusal” or “Validation or Refusal”
- Select the metadata you want to edit and the new value you want to apply
- Click on validate
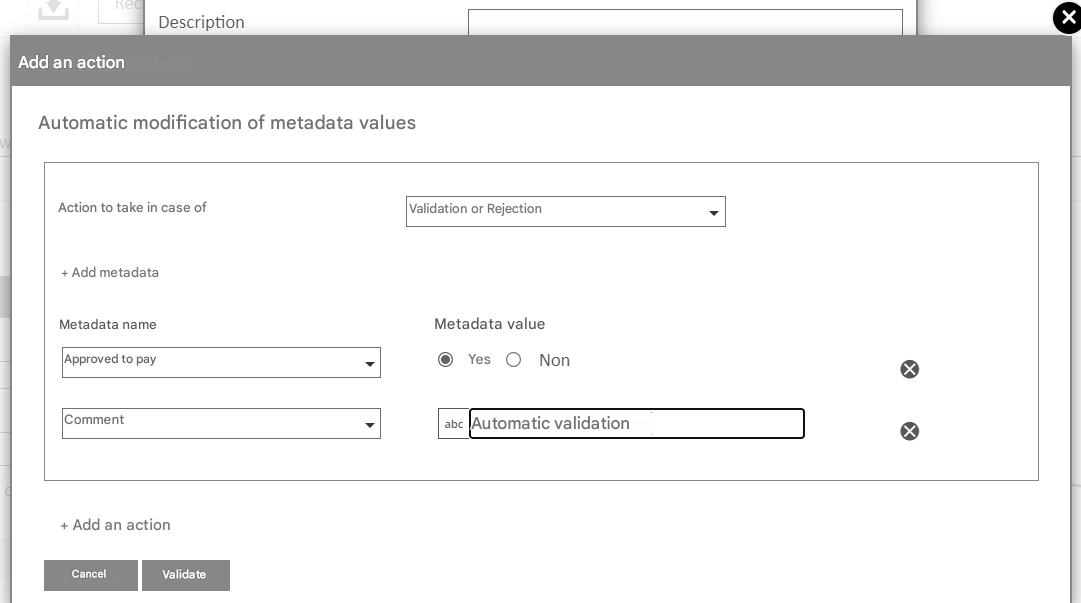
Please note that only metadata present in the ranking rules is compatible with this new feature.
Metadata specific to the electronic form cannot be changed automatically.
Section: Automatic Task Processing
The administrator of a workflow can decide to process tasks that have exceeded their due date for a period of time deemed too long.
This way, the task will be automatically processed.
A task can therefore be automatically “validated“, “refused“, “delegated” or “reassigned to another user“.
To view these actions, simply check the “Enable automatic processing” box
Define the due date duration at which automatic processing will be executed.
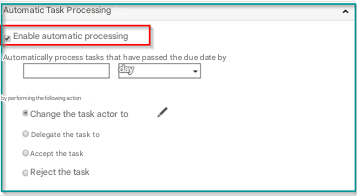
Attention: A task requiring a manual action (e.g. “Entering a comment”, “Entering metadata values”, etc.) will not be able to be validated automatically and the processing will be skipped even if the option is enabled.
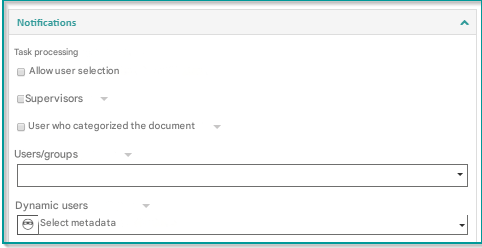
Section Notification
This interface allows you to automatically set up and send 4 types of notifications when a workflow task is processed:
- Enable user selection
- Supervisors (you can also choose the status “All”, “Validated” or “Denied”)
- To the user who filed the document (you can also choose the status “All”, “Validated” or “Rejected”)
- Has defined users or groups
- Has a dynamic user based on a value in a metadata
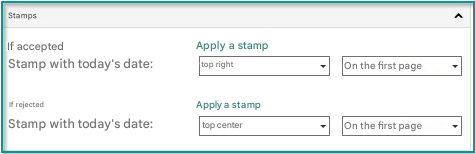
Stamps Section
In case of acceptance:
- Apply Stamp : Allows you to add a stamp to be applied to the document if accepted. (For more information, see the “Buffers” section below.)
- Stamp with today’s date: Choose the location of the stamp on the document, the current date will be applied
In case of refusal:
- Apply Stamp : Allows you to add a stamp to be applied to the document in the event of a rejection. (For more information, see the “Tampons” section below.)
- Stamp with today’s date: Choose the location of the stamp on the document, the current date will be applied
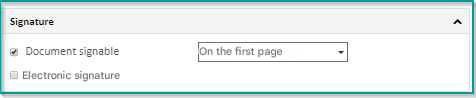
Section Signature
- “Signable Document” checkbox: Allows the document to be signed when validating the task from a mobile device.
- “Electronic signature” box: Allows the document to be signed electronically
- Then click on the “Add task”
 button.
Resuming overdue tasks
From the Open Bee Portal user profile, it is possible to choose how often an email summarizing your overdue tasks will be sent.
To access the following interface:
Click on “the user profile” (here by default it is the administrator)
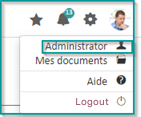
- Click on “Preferences/My Notifications”

- Choose the “Frequency of notification of overdue tasks” option
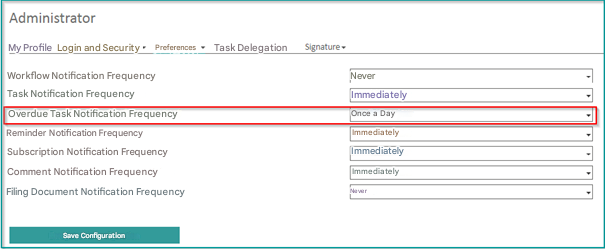
- Click on “Save Configuration”
Tampons
A buffer is added when a task is accepted or declined when the user is processing the task.
The chosen stamp will be automatically applied. It will be visible to the actors of the tasks.
A number of stamps are available. It is possible to add new stamps from a dedicated area in the administration.
For more information, see: Stamp administration.
Add a stamp
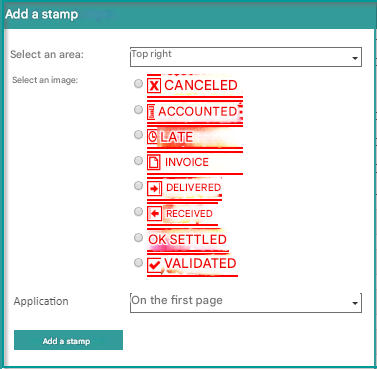
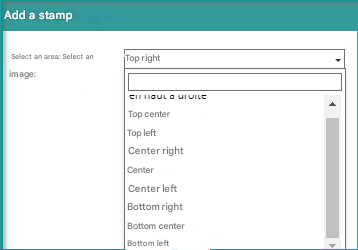
Select the area of the document to which the stamp will be applied.
A page is divided into 9 areas:
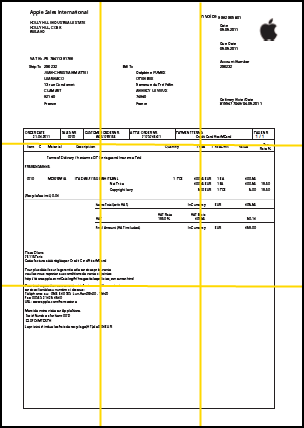
It is also possible to choose the page on which the stamp will be applied:
- front page
- last page
- All Pages
Dynamic player
This feature allows the document to be assigned to a different actor than the one specified in the task definition.
To work, this option requires:
- That a document is filed with an Open Bee™ Portal classification rule
- User aliases should be defined. (Configuring Aliases: Alias)
The dynamic actor feature in a workflow task takes into account the assignment to multiple users if the metadata contains multiple values.
For the “users and groups” metadata type, the administrator can choose whether the task should be assigned directly to the specified user or whether the alias should be applied.
Example:
We manage a workflow triggered on the “Delivery note” classification rule.
The first task in the workflow has Natasha as the actor, and the “ZIP Code” metadata is selected as “Dynamic Actor”.
One user, Andrew, has aliases 74940 and 74000. A document entering the workflow is assigned to Natasha, but if the document contains one of Andre’s aliases as the value of the “Postal Code” metadata, then the document will be assigned to Andre.
Operation:
- A document is classified with the classification rule “Delivery note” with the metadata “Postal Code” containing the value “74940”
- The “Delivery note” workflow starts.
Open Bee™ Portal then compares the value of the “Postal Code” metadata with the aliases available in the system. Since the value “74940” is associated with Andrew, the actor of the first task will be dynamically changed. André will therefore be in charge of validating this document in Natasha’s place.
Edit/delete a task
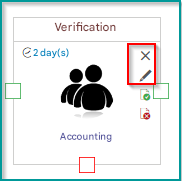
- To delete a task, simply click on the cross at the top right of the task. Please note that this operation is not reversible.
- To edit a task, click on the pencil at the top right. The form that was used to create it will be displayed and the task can be edited.