Open Bee™ Portal has a system of add-ons to enrich the basic functionality of the application. This section describes the processes for installing and managing an add-on.
Two management modes are possible:
- From the Open Bee™ Portal administration web interface
- Command line from the server hosting Open Bee™ Portal
From the web interface
Log in as an administrator, “Administration > Add-ons” section.
Installing an add-on
Click on the “Add add-on” button.
There are two options:
1/The add-on is available online and appears in the list of installable add-ons.
Then simply click on the “Install” button

2/ The add-on is not available online and does not appear in the list of installable add-ons, but you do have the ZIP archive of the add-on.
Then click on the “Install an add-on” link, then choose the Zip archive of the add-on present on your computer.
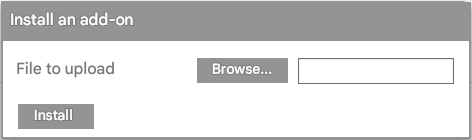
Once the add-on is installed, it will appear in the list of add-ons. It is necessary to enable it in order for it to be usable by a user.
Enabling/Disabling an Add-on
From the list of add-ons you can enable/disable add-ons from the menu associated with each add-on, or in bulk from the batch action menu.
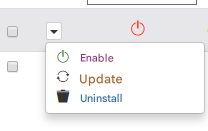
 Disabling an add-on usually hides it from users while retaining the associated configurations.
Updating an add-on
When a new version of an installed add-on is available online, a notification that an update is available is displayed in the “Version” column.
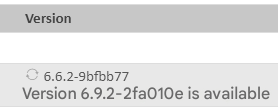
It is then possible to update the add-on by clicking on the icon  .
.
Updating can also be done through the unit or batch action menu in the add-on list.
Uninstalling an add-on
From the list of add-ons you can uninstall add-ons from the menu associated with each add-on, or in bulk from the batch action menu.
 Deleting an add-on will in most cases result in the deletion of the configuration and data associated with the add-on. This can vary from one add-on to another, as it depends on the choices made by the developers of the add-on.
Command Line
Add-on come in the form of a ZIP file.
All commands for managing the lifecycle of an add-on must be run from a console (as the machine administrator) in the “openbeeportal/sf3″ folder in the Open Bee™ Portal installation directory.
Installing an add-on
php app\console addon:install <addonZipPath>
Replace <addonZipPath> with the absolute path of the add-on.
Add-on-specific parameters can be specified during installation. (If they exist, these parameters are specified in the documentation of each add-on)
php app\console addon:install <addonZipPath> --param1=value1 --param2=value2
Enabling/Disabling an Add-on
Once the add-on is installed, it is not yet available to users. In order to make it accessible, it is necessary to activate it:
php app\console addon:enable Openbee/<addonName>
<addonName> is the name of the add-on. This is usually the same name as the one used in the zip archive. For an archive with the name “Chorus-6.6.0-ebea6ba.zip”, <addonName> will be “Chorus”.
The reverse operation allows you to disable the add-on of an installation, without deleting the data:
php app\console addon:disable Openbee/<addonName>
Updating an add-on
To update an add-on, use the following command:
php app\console addon:update <addonZipPath>
<addonZipPath> est le chemin de l'archive ZIP contenant la nouvelle version à installer.
Uninstalling an add-on
Before uninstalling an add-on, it is necessary to disable it.
php app\console addon:remove Openbee/<addonName>