Problematic
Open Bee™ Portal has metadata and information attached to documents. It is sometimes interesting to be able to display this information directly in working documents, such as a date of validation of the document in a workflow or simply a metadata of the document.
Principle of operation
Open Bee™ Portal can edit custom properties of MS Office documents.
Refer to the Microsoft documentation on “Custom Properties” of MS Office Documents.
Workflow output
If the “Adding validation information in Office documents” check box is selected in the workflow configuration. In this case, the following custom properties will be automatically added or updated in the document when it exits the workflow:
- “VERSION”: The version number is auto-incremented each time the workflow is released.
- “VALIDATED_BY” or “REJECTED_BY“: name of the last user to approve or reject the document before it was released from the workflow
- “VALIDATED_ON” or “REJECTED_ON“: Workflow release date in case of approval or rejection
Each time the metadata is changed,
If the “Adding properties in Office documents” located in the “General Configuration Administration>” screen is checked, each time the Open Bee Portal metadata of an MS Office document is changed, custom properties are created in the document with the same names and values as the Open Bee™™ Portal metadata.
Use case
To illustrate the possibilities of this feature, let’s take as an example a document describing a procedure.
This procedure goes through an Open Bee™ Portal validation circuit each time it is modified.
Each time a new version of the procedure is validated in the validation process, we want to automatically modify inside the Word document:
- version number
- the date of validation
- The name of the last person to validate the document.
This data will be presented, in the Word document, in the form of a table as follows:

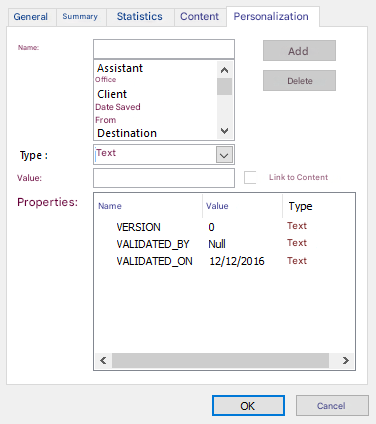
We’ll start by creating 3 custom properties in our Word document with the following names:
- VERSION
- VALIDATED_BY
- VALIDATED_ON
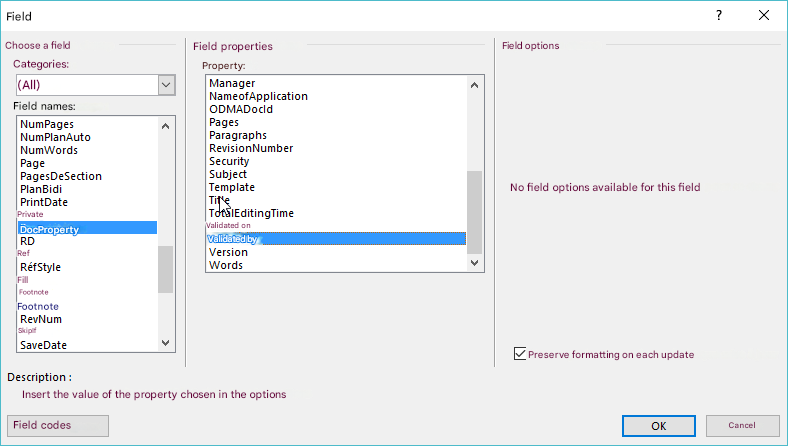
And then we’re going to insert these custom properties in the appropriate places in the document.
Setting properties screen in Word:
Field insertion screen, allowing us to insert our custom properties into the document:
In the end, the first version of our document looks like this:

Our base document is now ready to go into a Workflow, like this one below for example.
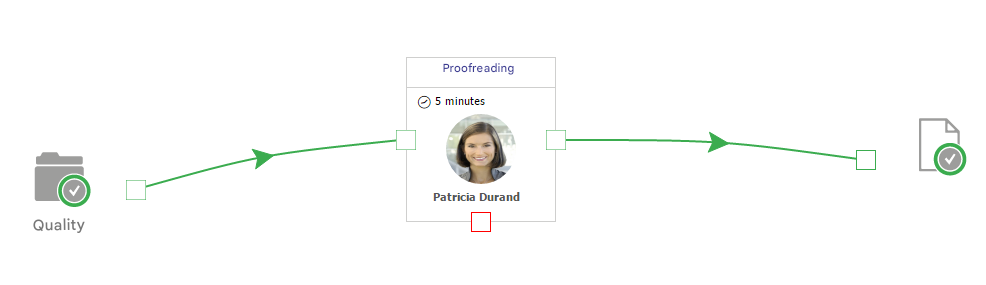
Once the document is approved, the properties in the workflow are changed and the content of the document is as follows:
