The Administrator can:
- add
- Edit users.
This function is essential because it allows each person to be given the following:
- a user account,
- a password
- Manage document access rights
Click on “Users”, from “Administration” “Users”
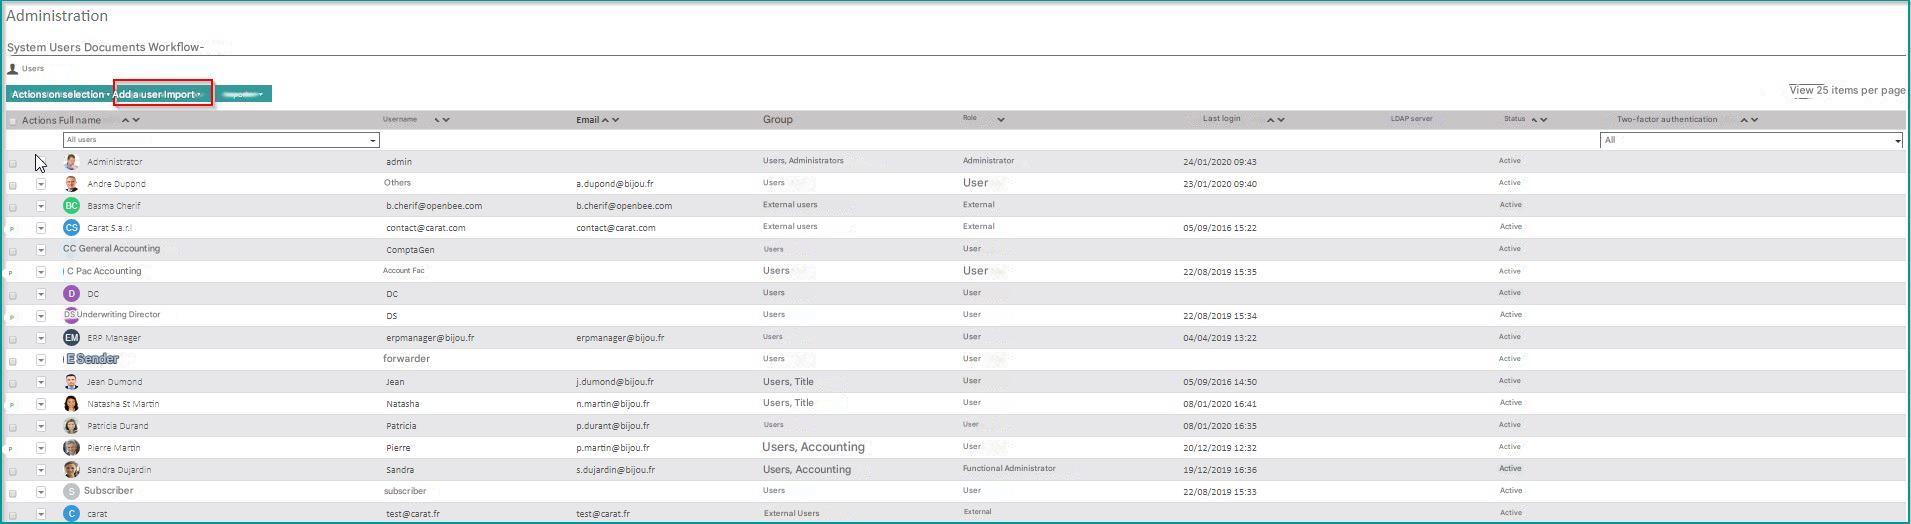
Adding a user
Click on the “Add User” icon.
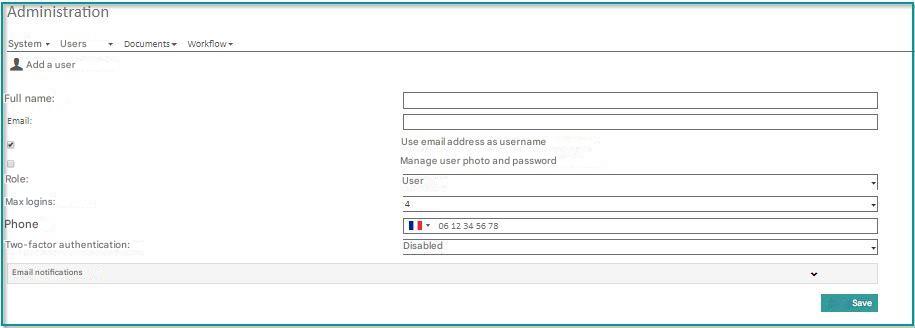
There are two ways to add a new user:
- The new user’s email address is known: fill in the required fields and click on ” Save “.
- The new user’s email address is not known: uncheck the box (Use the email address as your username), fill in the username that will be used to generate a unique username in the database.
Note: If the new user’s password is not specified by the administrator, the new user will be assigned a default password (init).
In both cases, the user receives an email notification like the one below:
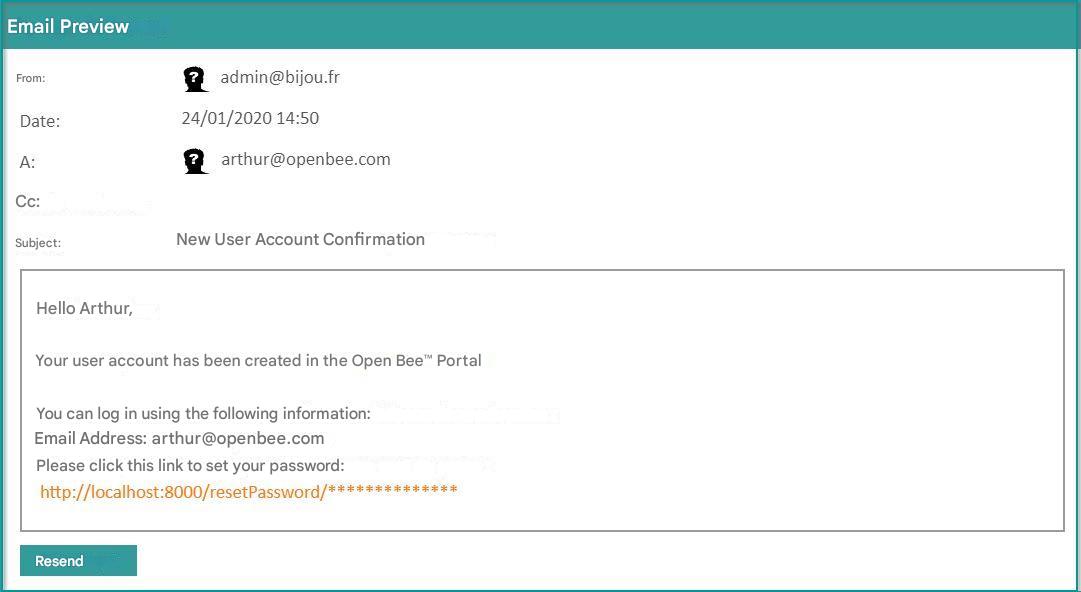
 The password reset link in the account creation email is valid for 48 hours.
Request a user’s password change
Ability to ask the user to change their password the next time they log in.
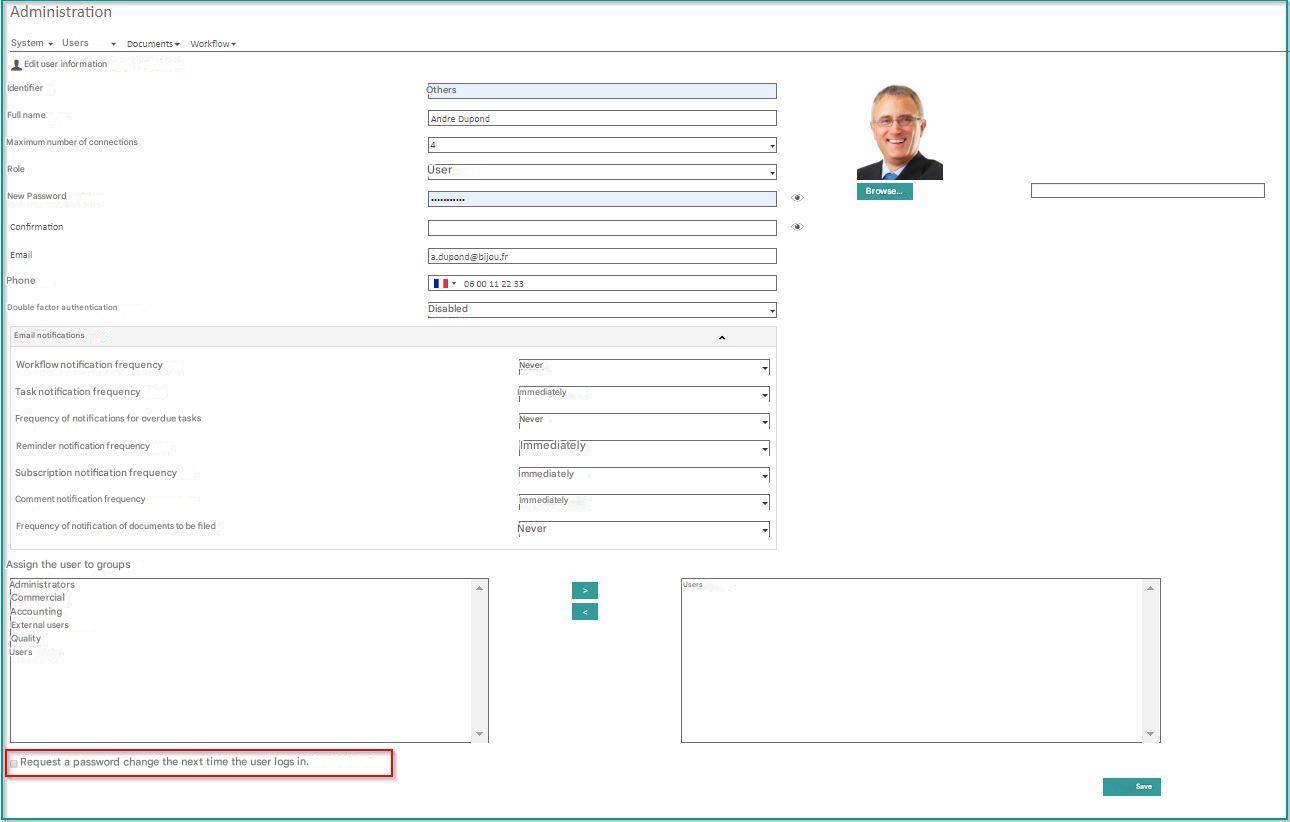
1. Click Edit
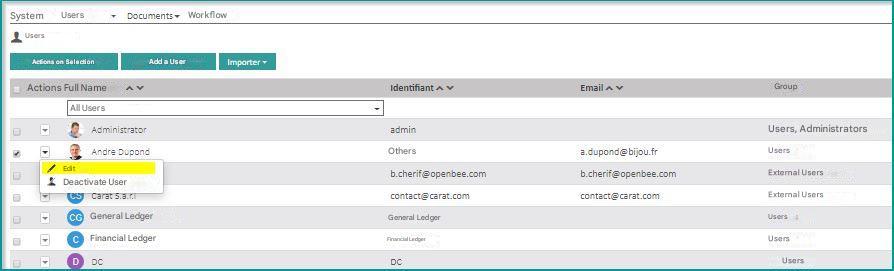
2. The window will appear, check the box “Request a password change the next time the user logs in” and then click on “Save”.
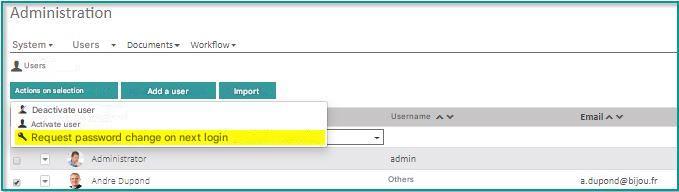
The administrator can also ask the user to change their password the next time they log in from the Administration/Users interface.
- By clicking Actions on the selection
- Click Request a password change the next time the user logs in
3. A confirmation message indicates that the information is updated successfully.
4. Then log in as a User, then fill in the username/password, before clicking on “Save”
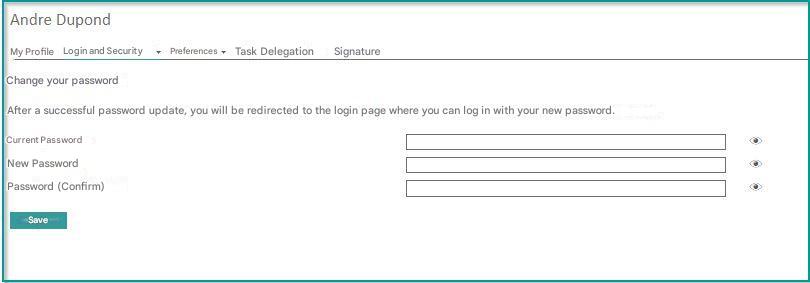
5 . A confirmation message will then be displayed when logging in: “Password changed successfully”
Change a user’s preferences
The user can change their preferences by clicking on “Preferences“.
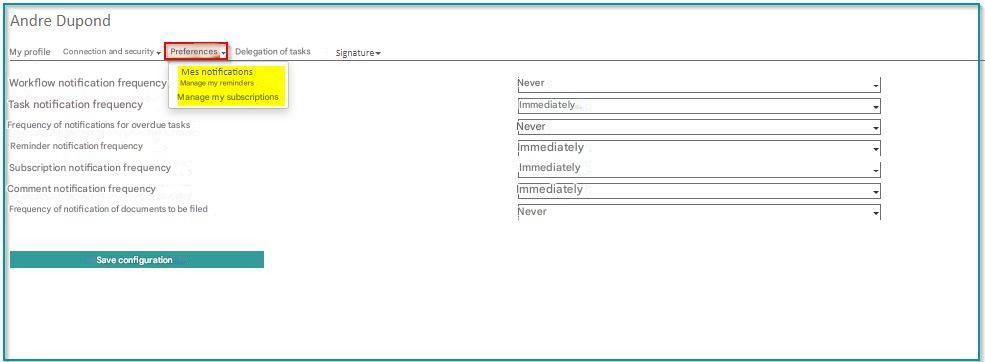
Change preferences and then click “Save Configuration” to save the change.
The confirmation message appears “Preferences updated successfully”
Note :
If the user ticks the email notification, they will receive email notifications for the folders they have subscribed to.
To do this, it is imperative that the settings for sending emails by the SMTP server are configured from the administration interface.
Deactivate a user
To deactivate a user, use the context menu from the list of users.
- Click Deactivate User
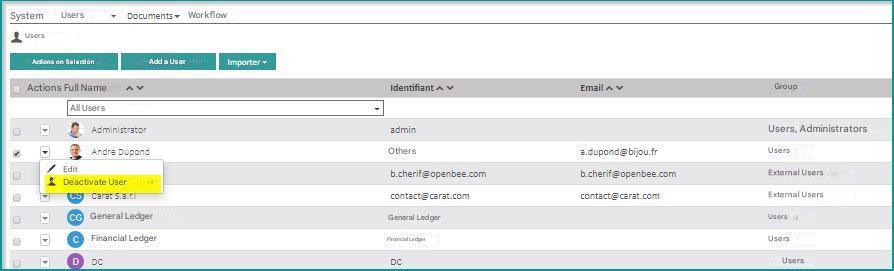
A deactivated user no longer counts towards the number of users available in your license. It can be reactivated at any time.
To activate the user:
- Select User
- Click on Actions on the selection
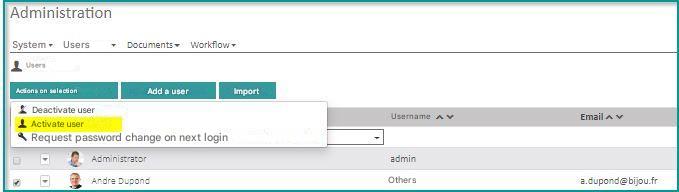
 Open Bee™ Portal does not allow you to delete a user; This is placed at the end of the list to facilitate navigation. This functional choice makes it possible to keep a history of all the actions carried out by all users of the system.
Freeze an external user
To freeze a user, use the context menu from the list of users.
This status is only available to external users. It allows you to no longer count the user from the number of users available in the license. A frozen user can therefore log in to their account and consult the documents in their personal space. However, it is no longer possible for them or any other user to add documents to their space.
This feature is used in the context of the distribution of electronic payslips (BPE), in order to allow employees who have left the company to continue to consult the BPE, without being counted as an active employee of the company from the point of view of the Open Bee™ Portal license.
Onboarding users from an LDAP source
Onboarding Groups Users from an LDAP Source
Importing a file in CSV format
This feature allows you to create multiple users in a CSV file and then import it.
Users will be registered automatically once the import is complete.
To import a file in CSV format, simply click on “CSV”
Example of a requested CSV file:
Username – Full name – Email – Phone – Password
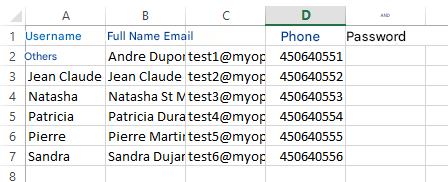
Download a sample file : utilisateurs.csv
Save your document by selecting CSV for the file type:
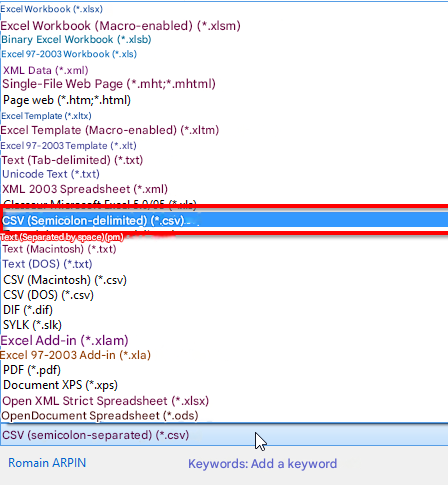
From the “Users” menu, select “Import” and “CSV“.
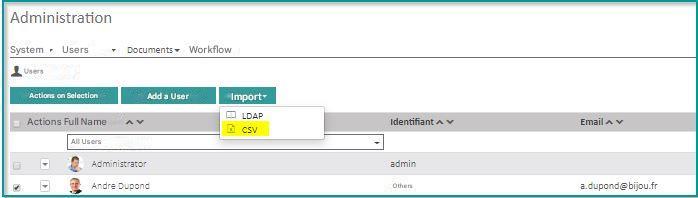
Upload the CSV file from the “Browse” button
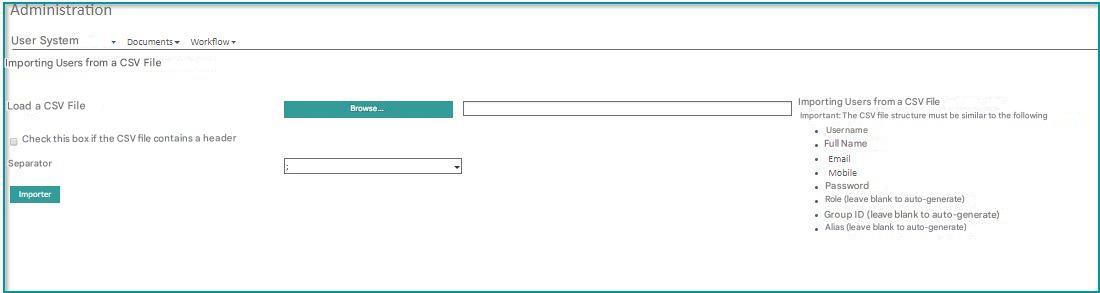
Select the checkbox if the document contains a header, and then select the separator from the drop-down menu.
Click “Import“.
Once the operation is complete, the confirmation message appears “Import from CSV File successfuly done”
Users will be added automatically in the “Users” section.