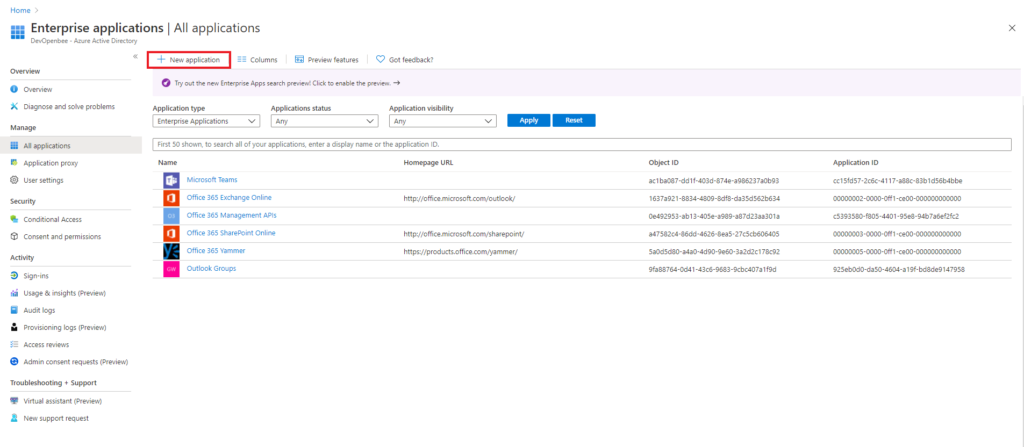
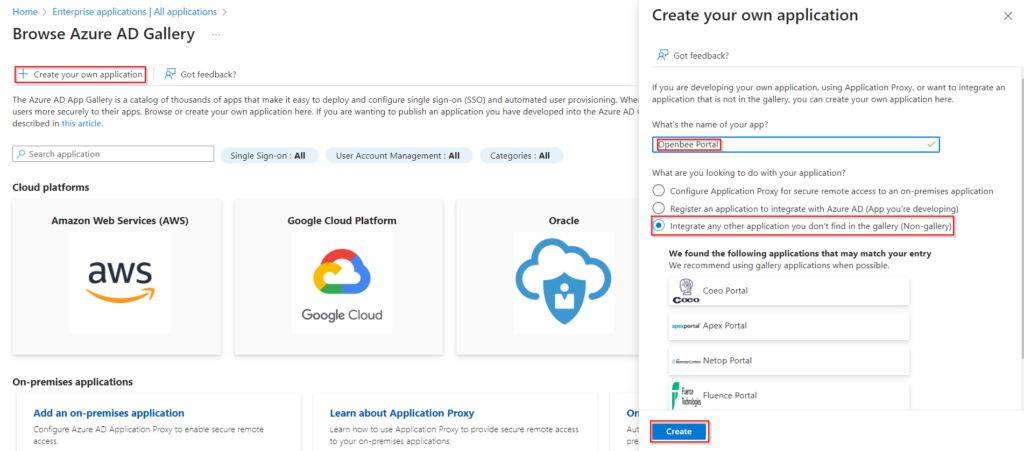
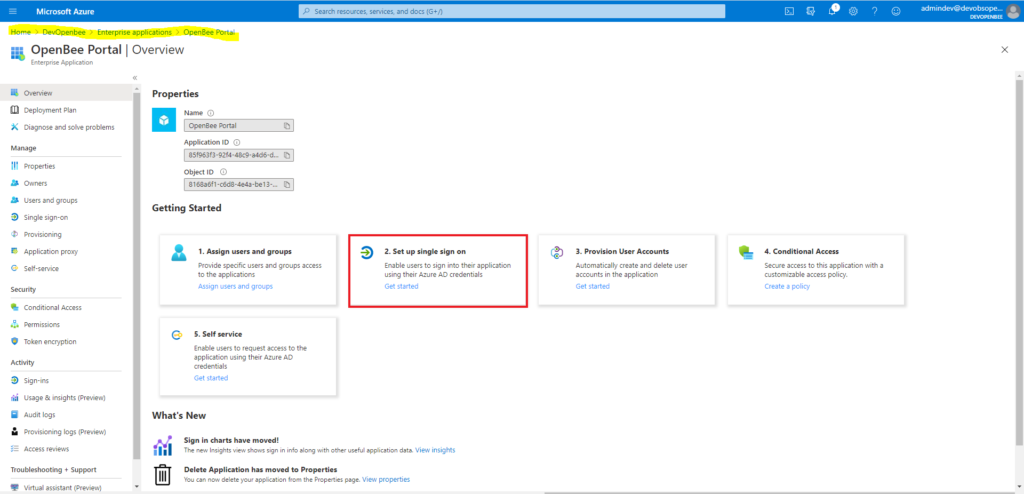
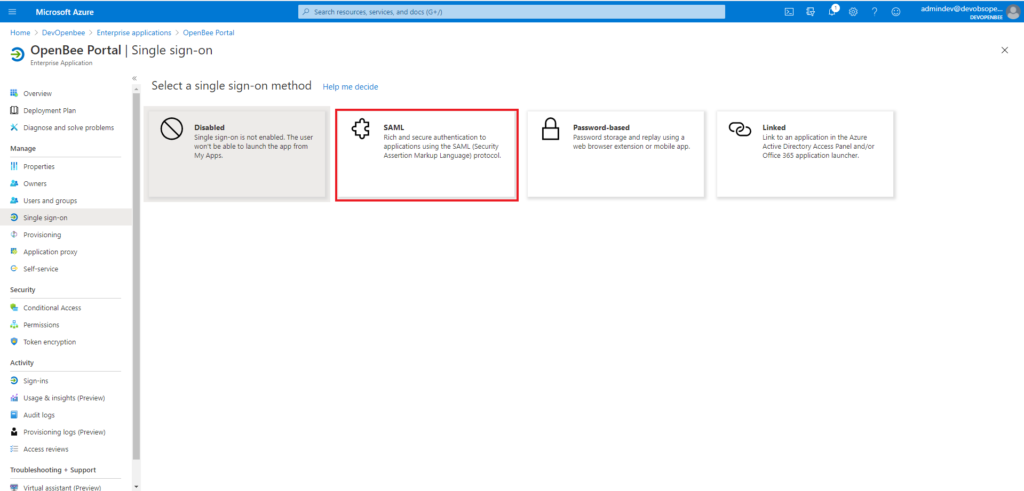
Choose the “Non-gallery application” type and enter the name of the application
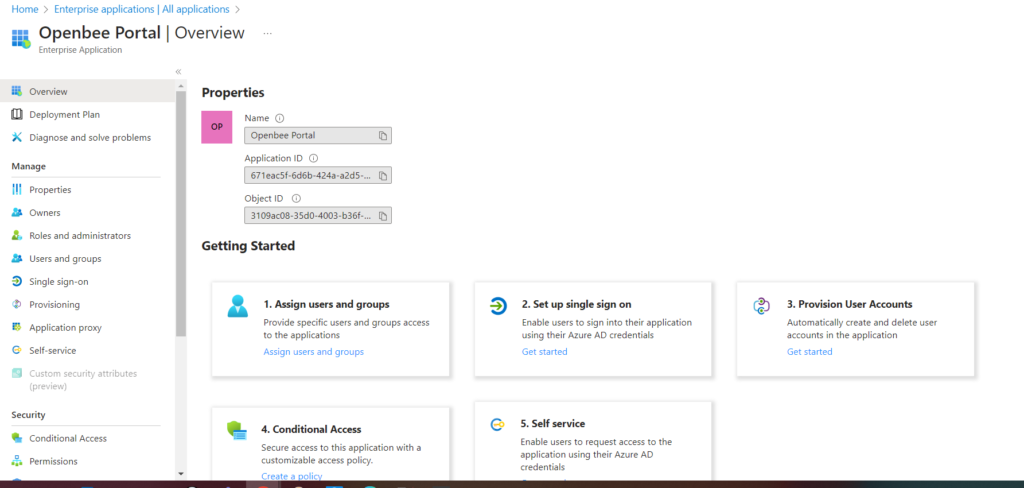
Now the app is added.
– Step 2: Generation of the Secret Client
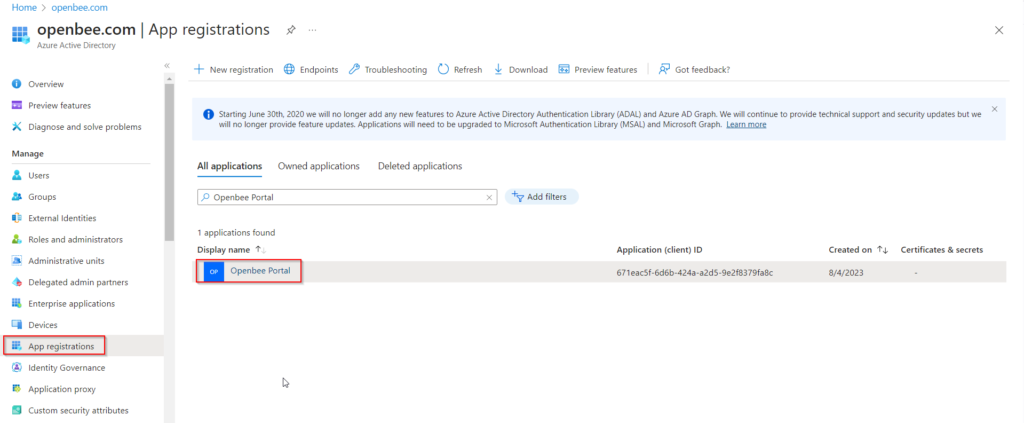
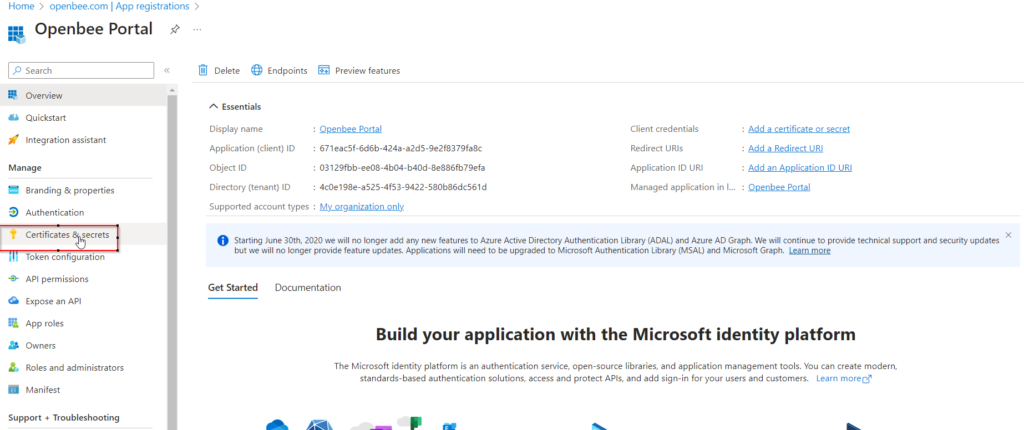
A secret customer ID must be generated, if it does not already exist. Go to the application registration interface and click on the application you just created “OpenBee Portal”
Click on Certificates & Secrets
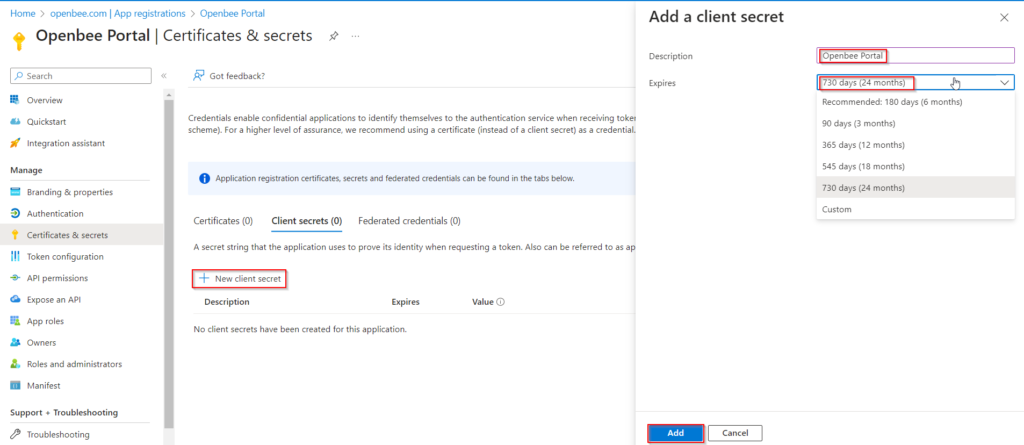
Click the Add New Customer Secret button
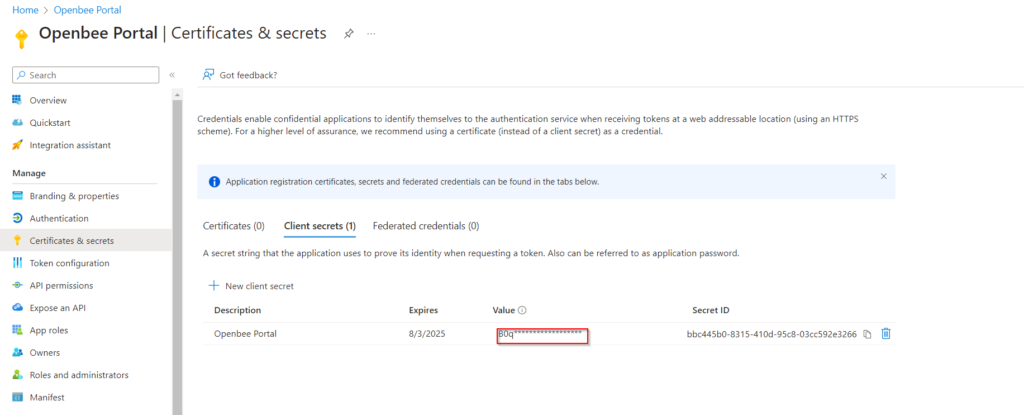
A new secret identifier has been generated.
The PIN must be recorded in a secure location so that it can be used in a next step. This passcode will no longer be readable after the page loads.
2. Adding Graph API permissions
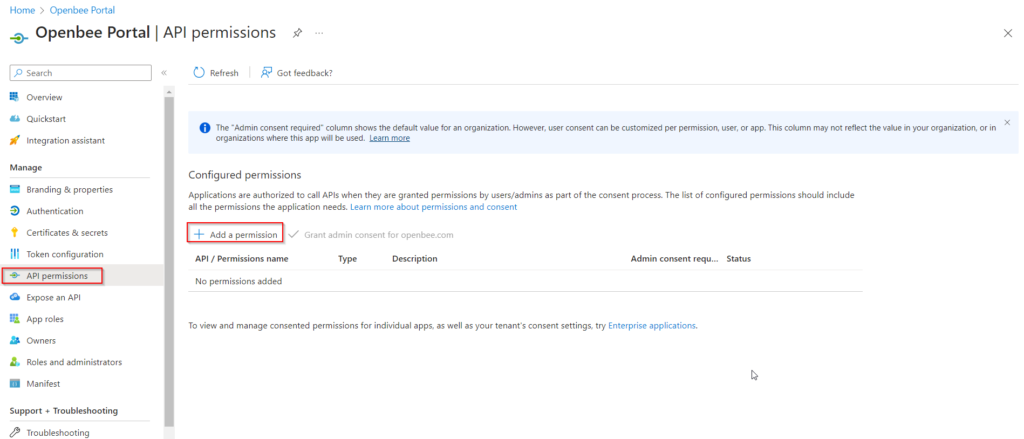
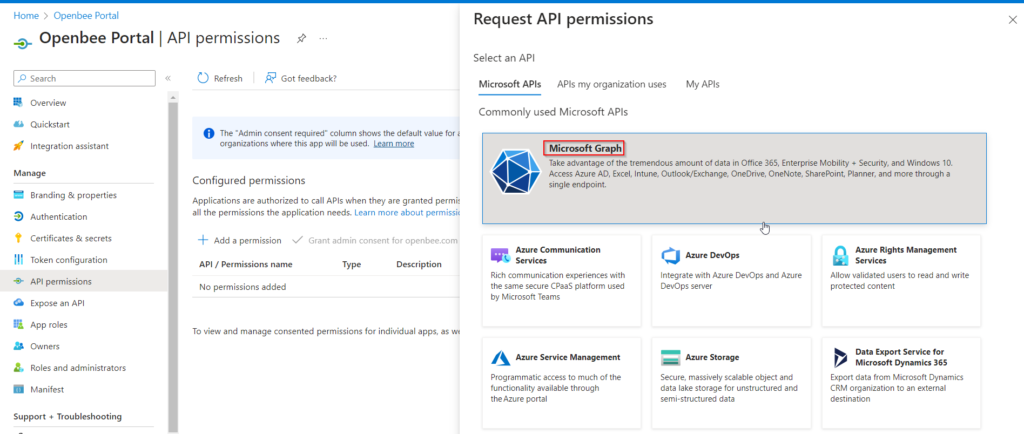
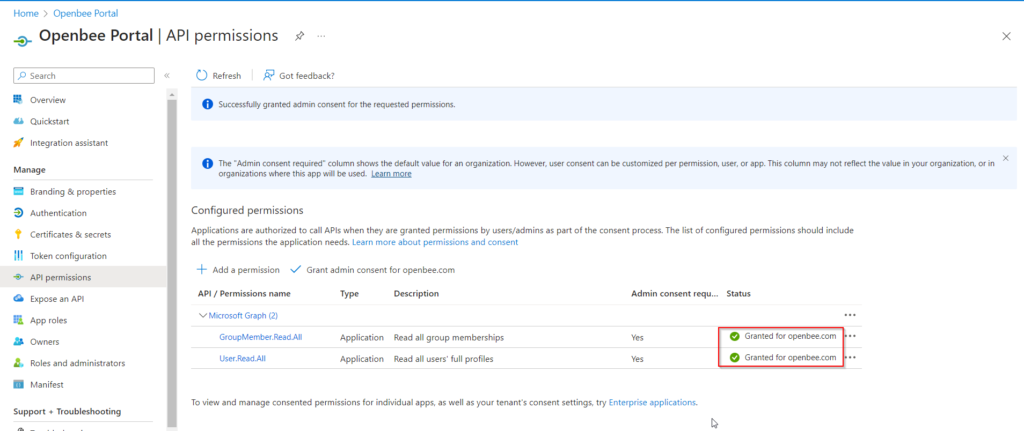
Navigate to the API permissions management interface and click on the add permissions button
Choose the Microsft Graph API
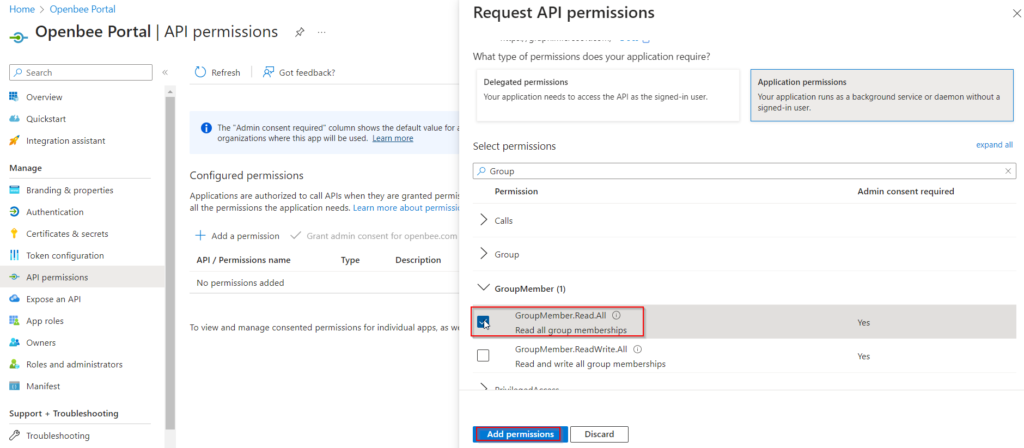
Choose app permissions
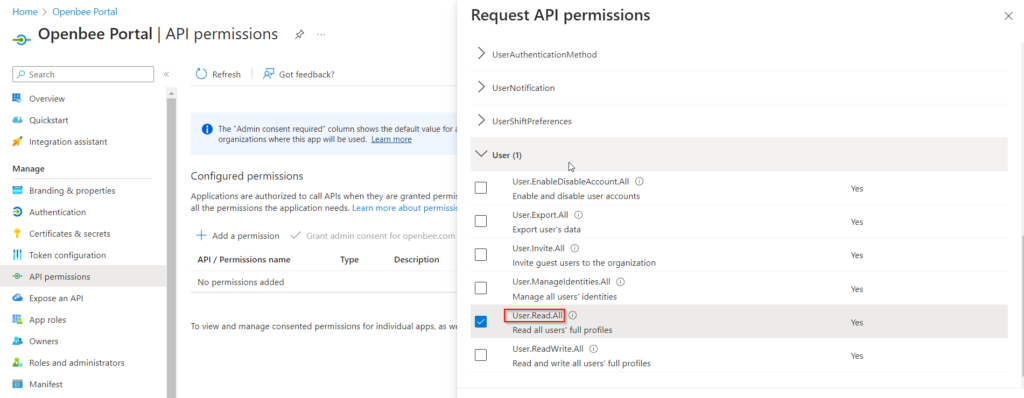
Check the “User.Read.All” permission:
Check the Groupmember.Read.All permission:
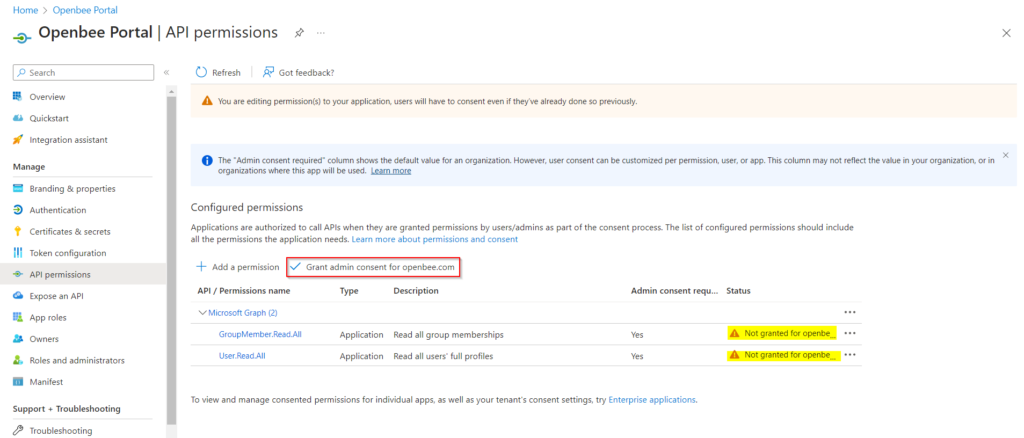
Permissions need to be validated by an administrator. Click on the Grant admin consent button, to approve the permissions
Permissions are added and approved.
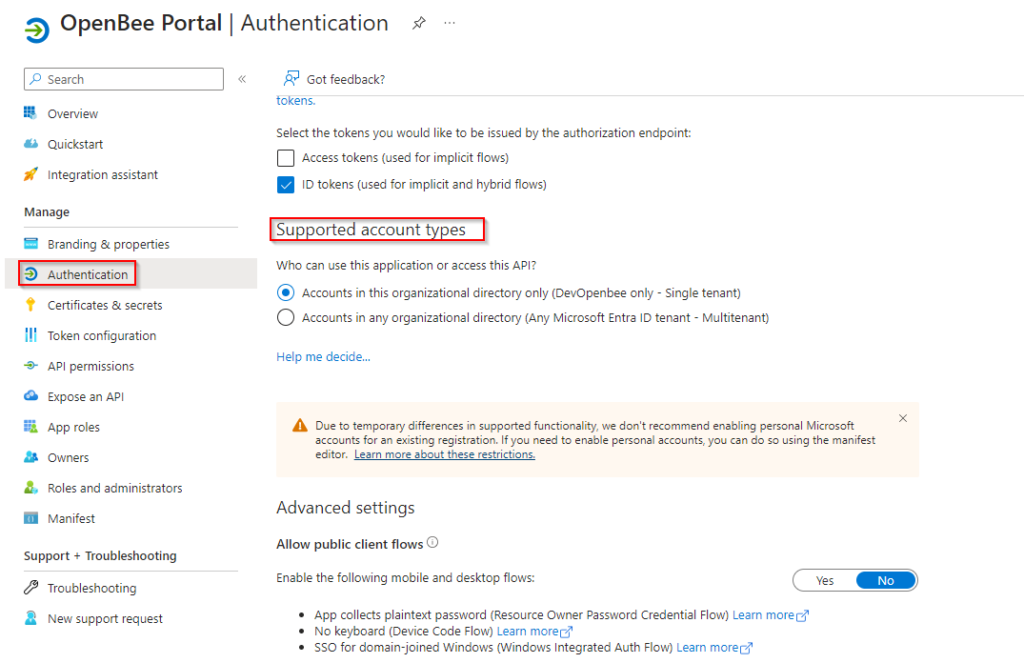
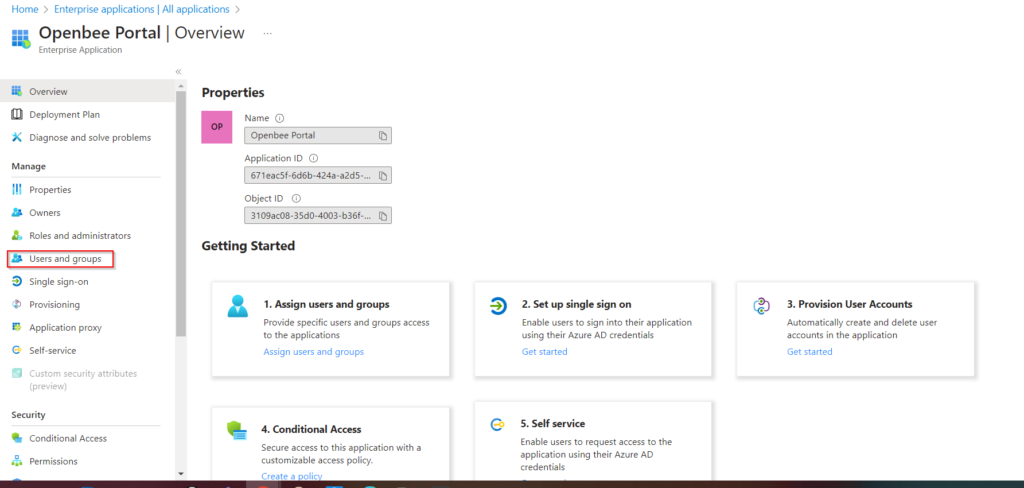
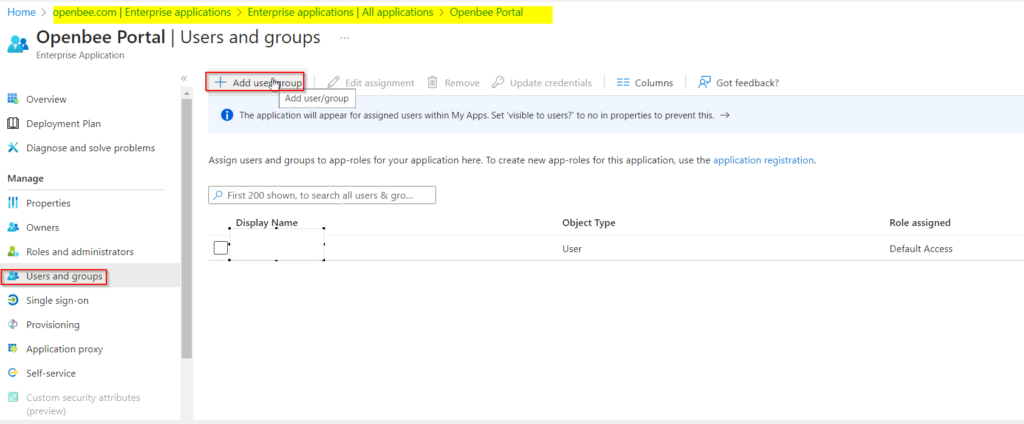
Allow users who are authorized to use the app from app registration
Add permissions to the groups or users who are allowed to log in to the portal.
3. Adding an Azure AD directory
To add an Azure Ad directory you need to have the admin_ldap role (same as for LDAP)
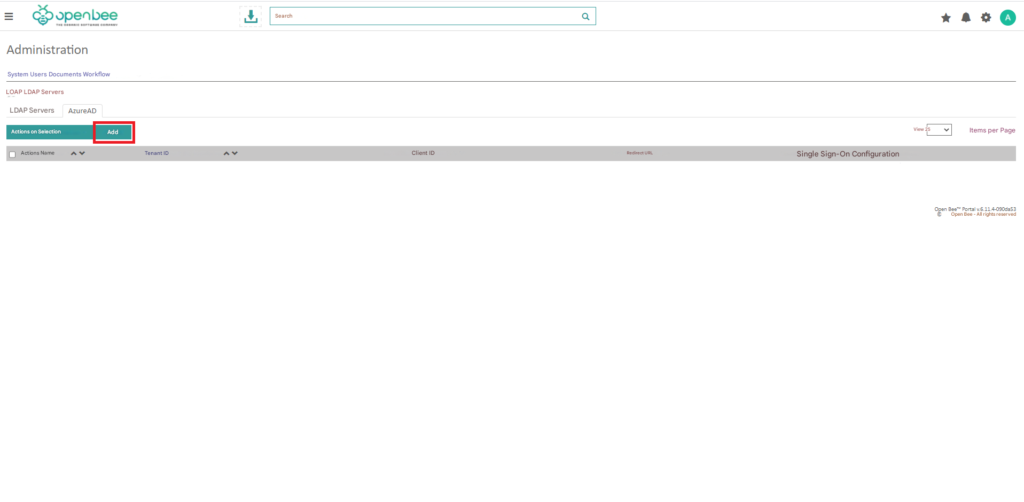
You have to navigate to: the administration interface -> LDAP servers -> Select the Azure Ad tab
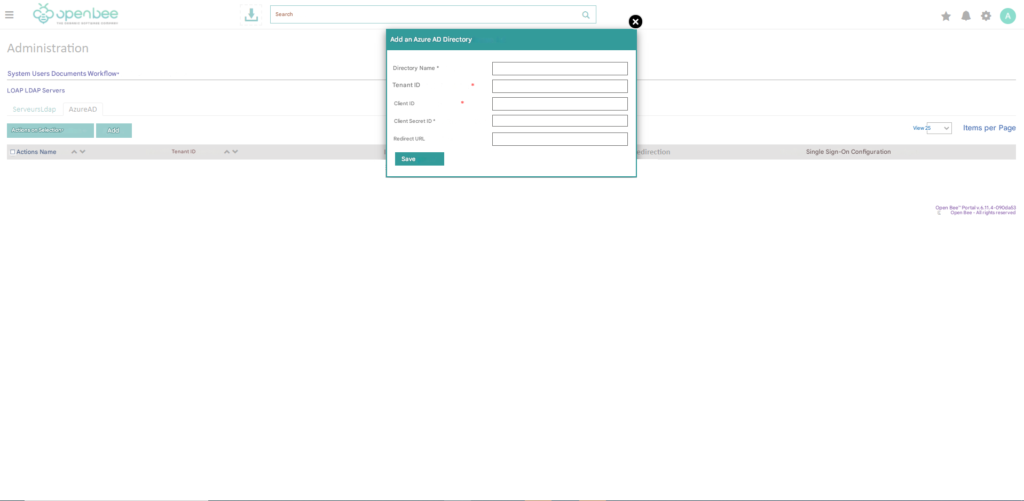
Click the “Add to Add Azure Ad directory” button
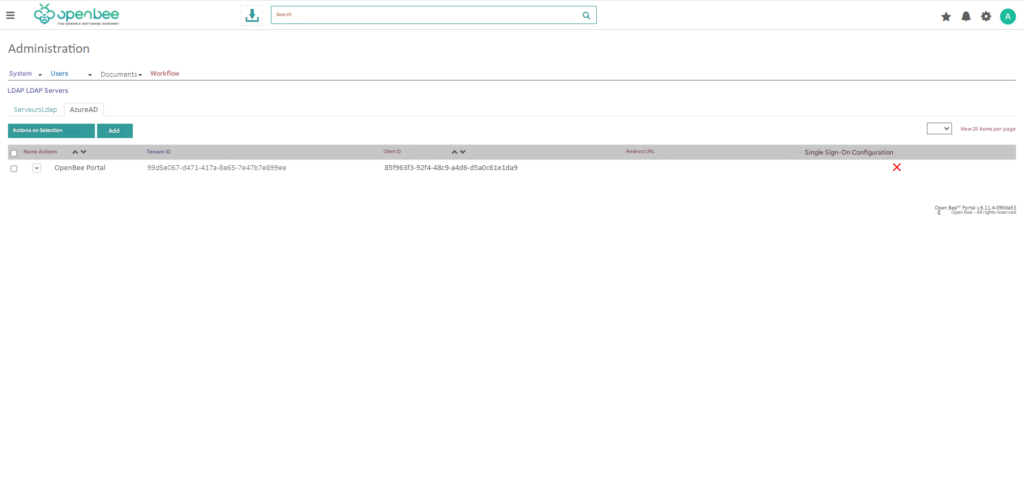
The azure ad directory has been added.
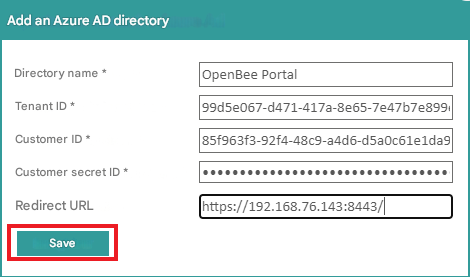
Directory Name: Display Name
Tenant ID: Directory(Tenant) Id
Client identifier: Application(client) Id
Client Secret ID: The secret client generated in step 2
Redirect URL: corresponds to the URL of the portal installation (Service provider)
SSO sign-in via Azure Ad
The SSO login function only works if the user has previously logged in to a Microsoft web application through their web browser, e.g. Microsoft Outlook, Office, Teams, etc.
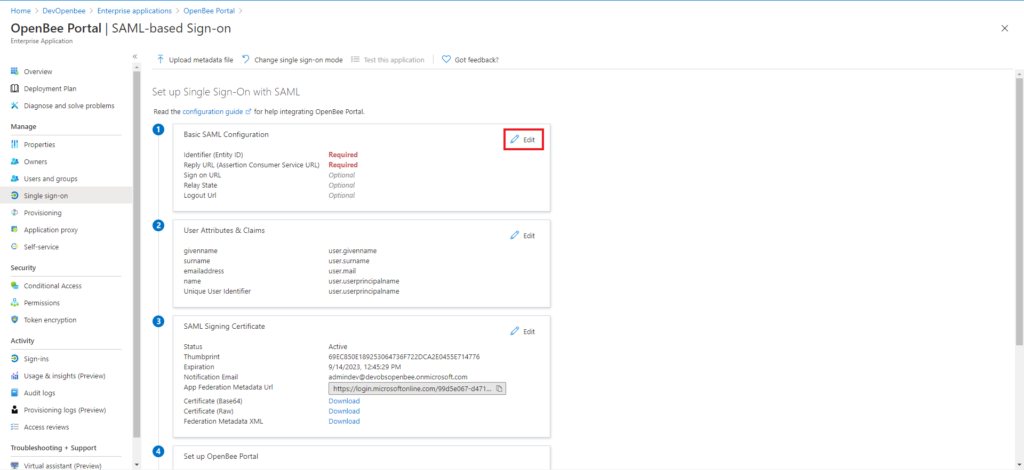
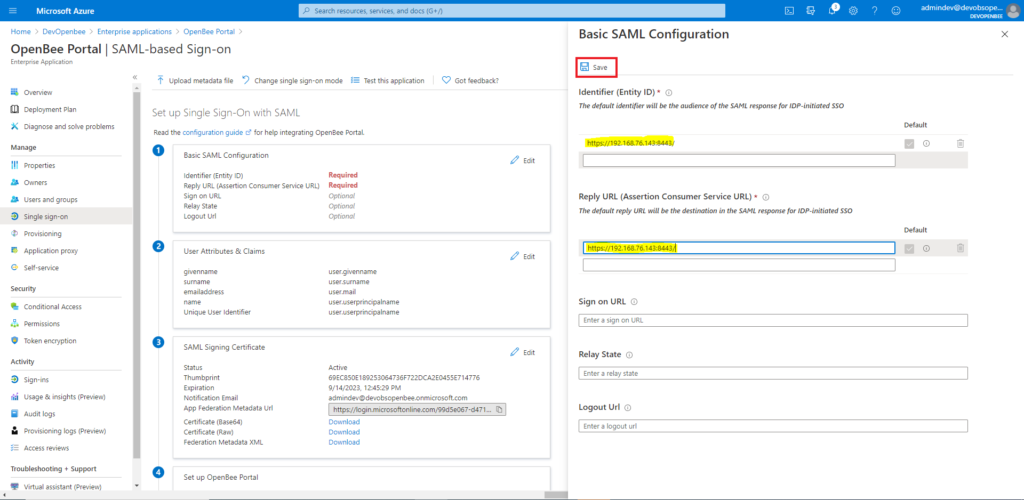
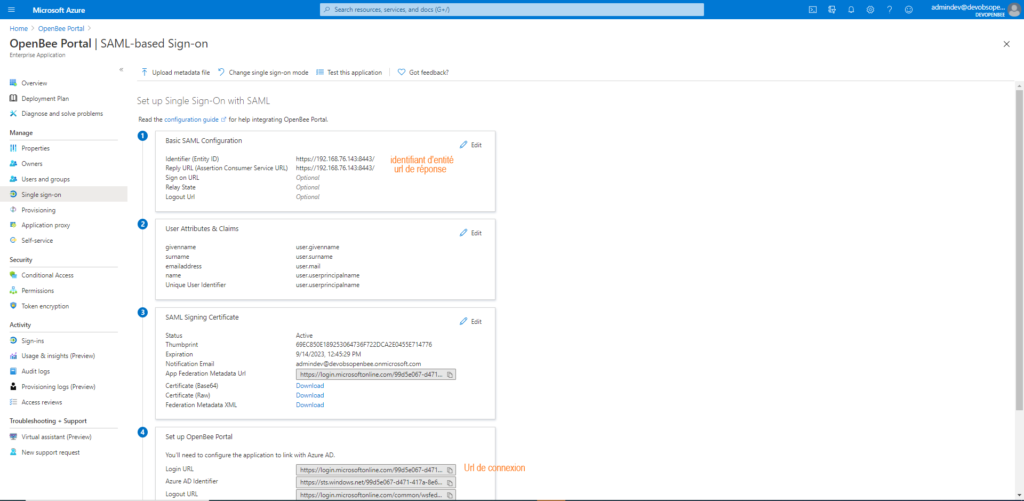
– Step 1: Setting up the Single Sign On on the Microsoft Azure Ad side
Reply URL will need to have the url of our Service Provider (our application), in our case the url of the portal Identifier cloud installation is an identifier of our SP to enter.
– Step 2: Setting up the Single Sign On on the OpenBee Portal side
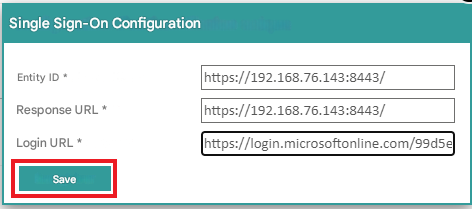
In the Azure AD directory display interface in Portal, right-click the name of the directory you just added. Choose the “Configure single sign-on” option
Note: Only one Azure AD directory will need to have an SSO configuration
Entity identifier corresponds to Identify
Reply URL matches Reply URL
Login url matches Login url
Enabling SSO Login
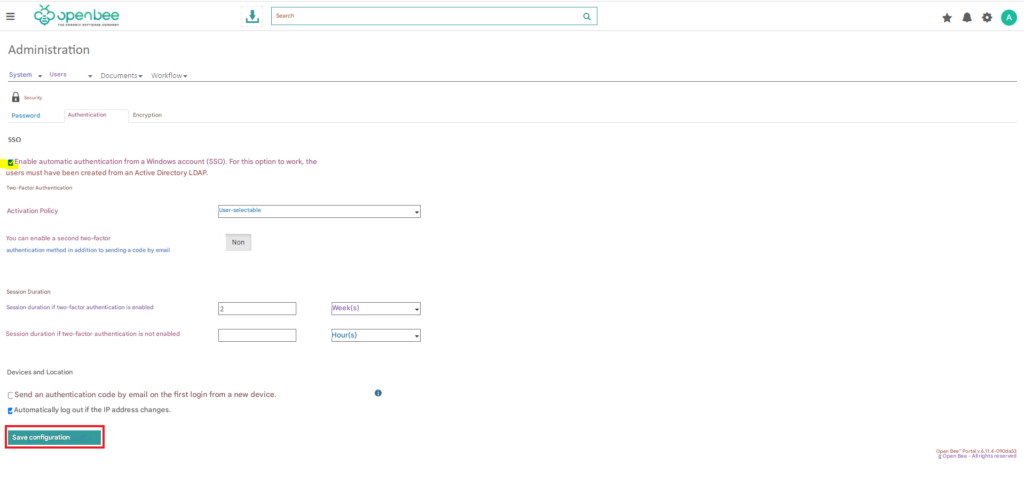
– Navigate to the admin interface -> Security -> Select the Authentication tab
Check the “Enable automatic authentication from a Windows account (SSO) box. To work, this option requires that users have been created from an Active Directory LDAP.”